Documentation wiki for all relevant practical and organizational knowledge around the OpenVillage House in Sidi Kaouki, Morocco. (For the wiki covering the activities in the House, see here.) Initial writeup by @matthias and @hazem. Please add and edit! With ![]() , from Sidi Kaouki.
, from Sidi Kaouki.
Content
- 1.1. From Sidi Kaouki
- 1.2. From Essaouira
- 1.3. From Essaouira-Mogador Airport
- 1.4. From Agadir Airport
- 1.5. From Marrakesh Airport
- 1.6. From Casablanca Airport
- 1.7. From airports abroad
- 2.1. Connecting to the Internet
- 2.2. Kitchen use
- 2.3. Organic waste disposal
- 2.4. Residual waste disposal
- 2.5. Washing machine use
- 2.6. Pool maintenance
- 2.7. Garden maintenance
- 2.8. Mobile phone and mobile Internet use
- 2.9. Fixing issues with the electricity supply
- 2.10. Fixing issues with the water supply
- 2.11. Maintaining the water softener
- 2.12. Fixing issues with the Internet connection
- 2.13. Dealing with injuries and sickness
- 2.14. Toilet
- 2.15. Cat
- 3.1. Getting local currency
- 3.2. Shopping in Sidi Kaouki
- 3.3. Shopping in the local area (Essaouira, Gazhoua, Smimou)
- 3.4. Shopping from major cities and from abroad
- 3.5. Getting and setting up a local SIM card
- 3.6. Using our Points of Interest map
- 3.7. Using the bicycles
- 3.8. Getting drinking water
- 4.1. To Sidi Kaouki
- 4.2. To Gazhoua and Essaouira
- 4.3. To Essaouira-Mogador Airport
- 4.4. To Agadir Airport
- 4.5. To Marrakesh Airport
- 4.6. To Casablanca Airport
- 4.7. To airports abroad
5. Protected information ![]() (Only accessible to staff users. Contains contact information of local authorities etc. which we don’t want to make public on the web.)
(Only accessible to staff users. Contains contact information of local authorities etc. which we don’t want to make public on the web.)
1. Reaching the House
Map location. The House is marked on Google Maps as “Dar Nezza, Sidi Kaouki”. Its exact location is 31.334333, -9.787306 – use that to mark the place on your GPS device or favourite mobile app for maps. (If you don’t have a favourite yet, use OsmAnd~, probably the best available open source map app for Android.)
Directions for finding the House. It’s really simple: Stand in the center of Sidi Kaouki so that the ocean is to your right. Move ahead and always follow along the main street (which is the only paved one, and leads parallel to the beach for the most part). There are almost no buildings on the way, and after around 3 km (30 minutes walking / 10 minutes cycling), the second streetside house on the right side is our House. It has the name “Dar Nezza” written in white letters on a blue gate, which is easily visible from the road. Here’s your route on Google Maps. The switch to the right of the gate that looks like a light switch is actually a working bell that is heard in the main living hall. Use it and we’ll open ![]()
Save this manual locally. It’s a good idea to put this documentation on your phone and / or computer before you travel. If you’re unsure how:
- In Chrome on a computer. Right-click on the page, choose “Save as …” and save it to a place where you will find it again.
- In Chrome on Android. Open this manual webpage, then click the download icon in the right side of the addressbar and click “Open” in the message that will appear. You can also open it anytime under “three-dots menu → Downloads”.
- In any browser on a computer. You can also print the print-optimized version of this webpage to a PDF file.
For urgent contact. If you need to talk to somebody in the House urgently (assistance while travelling etc.) you can call these Moroccan mobile phone numbers: [numbers no longer available here as our time in Sidi Kaoukiis ended now]
About the place. In earlier stages of the project @unknown_author scouted some potential places in Morocco, and we settled for a place near Sidi Kaouki. As you can see from the map, the house is not in a central location. It is in a remote calm place, with the beach around the corner and the next village 30 min away by walking. So we need to get out to Sidi Kaouki to interact with the local community and go to Essaouira to get the stuff which is missing in Sidi Kaouki.
1.1. From Sidi Kaouki
The “center” of Sidi Kaouki is 31.355639, -9.797694. All buses and shared taxis arrive here. Don’t be surprised that it will not look like any center you know ![]()
Transport options.
-
By bicycle. We have 3-4 working bicycles, so you can contact us when you arrive in Sidi Kaouki and somebody will come with an extra bicycle and pick you up. When you tell us in time, we can also lock a bicycle in the “center” so you can just take it and come to the House. The bicycle lock combination is
1632(red lock) and0008(black lock). -
By walking. The House is 30 minutes of walking from Sidi Kaouki’s center.
-
By hitchhiking. We do not have a car, motorcycle or similar in the House to pick you up, but people in the village of Sidi Kaouki are helpful. So when walking along the road to get to the House, you may be able to just stop a car going into the right direction and get a lift. The road has very little traffic though. 10 cars per hour at noon is no exception.
-
By taxi. We did not try this yet, but it may work. There are sky-blue “grand taxis” in the center of Sidi Kaouki, usually going to Essaouira. But you can try to negotiate that it brings you to our House instead (they might refuse though, as perhaps they are not even allowed to operate as “normal taxis”). We have no idea about the price, but as a rough indication: it was an additional 30 MAD once when adding this route to a taxi drive from Essaouira.
-
By microbus. Not of much practical use yet, but still: there is a small bus going four times a day from Essaouira to Sidi Kaouki, then passing by our House and going beyond. If you catch it in Sidi Kaouki, you can make it stop right in front of our House. A good option when transporting loads. You can recognize the bus from the “Sidi Mbarek” sign at the top of its windscreen. Schedule:
- hh:mm (first bus) [TODO]
- hh:mm [TODO]
- hh:mm [TODO]
- 15:50 (last bus)
1.2. From Essaouira
![]() Please note that there is no proper night transportation between Essaouira and Sidi Kaouki. The options below stop working in the evening!
Please note that there is no proper night transportation between Essaouira and Sidi Kaouki. The options below stop working in the evening!
Essaouira is 25 km from the House, and 22 km from the center of Sidi Kaouki. There are several transport options (and for all, you need to get local currency).
Essaouira is compact and walkable. If you arrive by Supratours bus, you are dropped off at a bus station that is NOT the same place that buses to Sidi Kaouki go from. The Supratours ticket office has free maps of Essa and is close to both the bus and the Grand Taxi stops.
-
By bus. There is a bus that goes six or seven times per day to Sidi Kaouki. It takes 30-40 minutes for its 25 km route via Gazhoua. The ticket costs 7 MAD (ca. 0.70 EUR). You pay in local currency in cash to the conductor inside the bus. The bus should have “Sidi Kaouki” and line number “2” written on a sign behind its front window, in Latin and Arabic letters. The center of Sidi Kaouki is it’s its final destination, so when the bus turns around you know it’s the last stop and you should get out. Note that the 15:35 bus on workdays can be so crowded that you simply can’t get in at the Essaouira South bus station. Also note, these buses can easily be 15-30 minutes late. Source of the bus schedule is a blog post from 2017-05. A different schedule with more buses was shown on the signs at Bab Doukkala station, but these signs do not exist anymore so we assume the schedule is also outdated (it was 6:00, 7:45, 9:30, 11:15, 12:45, 14:45, 16:30, 18:30).
-
Bab Doukkala bus station schedule to Sidi Kaouki:
- 7:20 (first bus)
- 9:10
- 11:30
- 13:30
- 15:30 (probably; we saw it once around 15:35 at the Bab El Borj bus station)
- 16:30 (source says 16:00 but we used it once and were 17:05 in Gazhoua, also does not fit with the 17:10 return journey from Sidi Kaouki if it would leave 16:00)
- 17:30 (perhaps; only if there is indeed a 18:10 return journey from Sidi Kaouki, which was mentioned by a local by we could not confirm this so far)
- 18:30 (last bus, definitely)
-
Bab El Borj bus station schedule to Sidi Kaouki (same notes as above apply):
- 7:25 (first bus)
- 9:15
- 11:35
- 13:35
- 15:35 (probably, not sure; seen once)
- 16:35 (see above)
- 17:35 (perhaps; see above)
- 18:35 (last bus, definitely)
-
-
By microbus. This is a transport option that we have not yet figured out. These are small buses (for about 8 passengers?) and they go from Essaouira to Sidi Kaouki and beyond four times a day. They pass directly by our house, means you can make it stop right in front of our gate to get on or off. [TODO: bus schedule, bus station in Essaouira]
-
By grand taxi. There is a grand taxi service from the Madina grand taxi station to the center of Sidi Kaouki. Usually the taxi will be an old, sky blue Mercedes car, and at least some have a “Sidi Kaouki” destination label on their doors.
The price is fixed by the city at 100 MAD for the whole taxi to Sidi Kaouki. So the price per person will be from 15 MAD (6 passengers in a 4 passenger car, it happens here
 ) or higher, depending on how many other passengers you or the taxi driver will find to share the taxi.
1.3. From Essaouira-Mogador Airport
There are several transport options (and for all, you need to get local currency):
-
By taxi. Usually you take a taxi from the airport. It’s by far the most comfortable and shortest option, but if you have to take a whole taxi alone it will also be expensive. Expect 60-80 MAD for the whole car, though we did not test this option yet. Any sky blue car is a taxi, esp. if it is an old Mercedes car or has a round label on its front door. We don’t yet know if these taxis are the shared “grand taxis” that have fixed routes ending in the center of Sidi Kaouki or if they are normal taxis that go to the place you tell them. If these are “grand taxis”, you can still try to negotiate with the driver to bring you directly to our House; expect to pay ca. 30 MAD in addition for that, but prices will vary and also depend on your negotiation skills
 And if you only get to the center of Sidi Kaouki, see here for how to proceed from there to the House.
 -
By bus via Gazhoua. Cheaper than a taxi – expect 7-10 MAD, though we did not test this option yet. But it also takes longer, and is longer: 28 km compared to 18 km from the airport to the House directly by taxi. In addition, you’ll only arrive to the center of Sidi Kaouki, and have to proceed from there to the House for the last 3 km.
But if you are feeling a bit adventurous, here’s how. Take the public bus from the airport to Essaouira and get out at Gazhoua bus station (you may have to ask to stop it). Cross the street to get to the bus station for the other direction, and take the next bus going from Gazhoua to Sidi Kaouki. At least two bus lines go that way, but you may still have to wait up to an hour. So far, we only have the times for line 2 “Essaouira – Gazhoua – Sidi Kaouki”, see “Reaching the House: From Essaouira”.
1.4. From Agadir Airport
From Agadir Airport to Inezgane:
- By taxi. There are shared taxis to for 7-10 MAD.
- By bus. You can also go outside and wait for the bus. The only bus that goes from there is the one to Inezgane.
From Inezgane to Essaouira or Sidi Kaouki:
-
By bus. Buses to Essaouira are available and cost 50-70 MAD. See the bus schedule. You can book them from the bus station or a nearby travel agency office. These buses pass by Sidi Kaouki on their way to Essaouira, so you could ask the driver to drop you off on the highway at the junction to Sidi Kaouki. Then take your chances with any car entering or a bus going to Sidi Kaouki – if you’re unlucky, it’s a 13.5 km walk. Hitchhiking on the open road works better with tourists than with locals, and your chance with a random car is around 10% (small sample size of 10, to be determined better
 ).
). -
By grand taxi. The service costs almost the same as buses per person, but is not comfortable as they reportedly load 6 passengers and the driver into a normal Mercedes passenger car. They will take the same route as the buses, so just as described for the bus, you could ask the driver to drop you off at the highway junction to Essaouira.
From Agadir center to Essaouira or Sidi Kaouki:
- By bus. If you reach to the center of Agadir, there should be a bus station as well. The same buses going from Inezgane also go from Agadir center, so see above for details.
To proceed from Essaouira, see the corresponding section above.
1.5. From Marrakesh Airport
If you arrive in the evening, the only way to reach the city center from the airport is by taxi. Taxi drivers know you have no choice, and charge (comparatively) a lot of money. We paid 18-20 EUR, but there are reports of people being charged up to 50 GBP. It comes down to how much you feel like negotiating the price down.
Once in the center, there are buses going from Marrakesh to Essaouira, and they take close to 3 hours. There are two bus lines: Supra and CTM.
Ticket purchase. You can try to reserve seats on the buses in advance. Both companies have websites: CTM and Supra. But they are both unreliable websites with design problems. Other sites do a better job of showing the timetables. They in theory accept foreign credit cards, but non-Moroccan cards normally glitch in online payments, so in practice you’ll likely have to just go there and hope for the best.
Schedules. CTM buses leave at: 8:30 and 12:30. Supra buses go at 8:00, 9:00, 10:45, 12:30, 15:00, 17:00 and 19:00. The 9:00 bus they call “Comfort Plus” – it is comfortable and even has on-board wifi. They say the 12:30 bus is a CTM bus. This British site has a working schedule, which is assumed to be up to date.
Departure location. The two bus lines are located in different places. Supra, an extension of the national rail service, is located next to the train station and the CTM is a few (about four) blocks away at Rue Abou Bakr Seddiq. CTM prices might be somewhat lower.
Hotels. There are several hotels located by the train station. The Opera Plaza Hotel is more money – 16-25 EUR more than the other nearby hotels, but they have their own airport shuttle and excellent rooms. It is a 3-5 minutes walk from the Supratours terminal. The railway station, right next to it (a one minute walk from the Opera Plaza), hosts a small shopping mall that includes a Telecom Maroc shop. It opens at 10:00, though – too late if you mean to catch one of the morning buses to Essaouira.
When in Essaouira. To proceed from Essaouira, see the corresponding section above.
1.6. From Casablanca Airport
There are several transport options:
-
By bus. No clear information yet, but you’d go by bus to Essaouira and then proceed from Essaouira according to the corresponding section above. If you arrive in the early evening in Essaouira, it’s better to spend the night there as apart from the occasional taxi there is no way to get to Sidi Kaouki then. [TODO]
-
By airplane. There is an internal flight from Casablanca to Essaouira Mogador Airport every second day, and it “always” costs just 32 EUR (see). Proceed from Essaouira Mogador Airport according to this section.
1.7. From airports abroad
Here is a list of recommendable or tested connections that we have found so far:
-
From Rome. Royal Air Maroc has a 17:15 flight to Casablanca, from where a connecting flight will take you to Marrakech. This comes out at ~100 EUR. Arrival in Marrakech is quite late, so you will have to spend the night in town and continue the journey the next day. Tested by: @alberto.
-
From Paris-Orly Sud. There is a direct flight to Essaouira-Mogador Airport twice a week in the early morning. However security checks are so totally annoying in France these days that we recommend not to use this route. Tested by: @matthias.
2. Actions in the House
2.1. Connecting to the Internet
There is wifi throughout the House, on the rooftop terrace and around the pool area:
- wifi name:
DAR NEZHAupstairs,DAR NEZHA AP1downstairs around apartment 1 - wifi password: written on a paper hanging in the main living hall (for mods, also below in chapter “5. Protected Information”).
The wifi is supplied by a mobile broadband connection (3G / 4G network), which will become expensive when using it excessively. So be a bit (just a bit) considerate. Watching videos online is fine, file sharing software that constantly uploads and downloads is not, frequently downloading huge files (>1 GiB each) is also rather not.
In case of issues with the wifi connection:
- See if you can get closer to one of the three wifi routers, esp. with less walls in between. One is in the main living hall, one in apartment 1, one on the rooftop watertank.
- If there is no Internet connection at all, talk to @matthias to fix it, or if you know what you are doing, use the instructions in the corresponding section below to fix it.
2.2. Kitchen use
Water. The tap water is not drinkable (too high salt content, maybe other issues). But it’s ok to use for dishwashing and cooking (just use less salt). For drinking water, use the container with potable water. In the upstairs kitchen it is on the fridge, and usually there are several refillable 5 l water cans around with our stockpile of potable water to refill the dispenser.
LPG stove. We have a stove in the upstairs kitchen. It uses LPG gas fuel. As a safety precaution, the valve of the LPG bottle should be closed every evening. For that, open the cabinet to the right of the kitchen stove, and turn the knob at the top of the LPG bottle right until the valve is closed. (“Turn right” as in “like a normal bolt” and “clockwise when looking at the bottle from the top”.)
LPG bottle exchange. One bottle lasts for 3-4 weeks of daily usage. There are three full spare bottles in the small shed below the main stairs. They belong to the gardener, but we can use them as spares if we also replace them with full ones later. To exchange an empty LPG bottle with a full one: Put it on a Monday morning at the streetside, in front of our main gate. (Iskoha villagers will also put out their LPG bottles at the time, on the opposite side.) A LPG bottle truck will come between 11:00 and 14:00 (observed 13:15) after delivering to the shops in Sidi Kaouki. They will ring to get the payment for the LPG refill, which is 40 MAD for a bottle of the size we have.
Making coffee. We have moka pot coffee makers in different sizes. Use the water with the least salt content you can find. Water bought from a shop is the best, water from the well near the school is the second best, water from the well near the mosque is already too salty for good coffee, and the tap water is really unusable for coffee.
2.3. Organic waste disposal
Organic waste and paper is composted in the garden (so we can collect them in the same bin). It works like this:
- Find a spot along the wall, to the right after entering the main gate, that has neither tree roots nor has been dug already (which would mean you’d dig compost out rather than in).
- Dig a hole large enough for your bucket of kitchen waste, and fill it into the hole.
- Put in quite some water. Either with a hose in the north-east corner (valve is close to the garden wall), or with the waste bucket. Clean the waste bucket in the process.
- Put the dug-out soil on top of the waste.
- Enjoy.
We probably want to create a larger hole and compost the regular way in that (with a central pole for aerating it by moving it around from time to time). Then, when we leave, we’d add soil on top only once.
2.4. Residual waste disposal
There is no waste collection in Sidi Kaouki – see here for some of the background story. So it’s better to not produce much plastic and metal waste at all.
The next proper disposal option is in Ghazoua, on the way to Essaouira. We have yet to find an acceptable way to get our residual waste there, or an acceptable alternative to dispose it otherwise. So for now, it seems best to wash food containers and store the waste “nice, dry and clean” until we know what to do with it …
2.5. Washing machine use
-
Connect the washing machine through the bathroom window with electricity, using the extension cord usually found in the bathroom.
-
Put the items to wash into the machine’s left bucket. Do not fill it more than half, as the rotating content might otherwise damage the little fabric filter bag hanging in from one corner.
-
Make sure the valve selector dial is set to “Wash / Rinse”, as all water you put in would just flow out again if it is set to “Drain”.
-
Use the hose to fill the left bucket with water until it just about covers the clothing.
-
Put in “a normal amount of washing powder”, about one coffee cup for a full load - at most. The more soap you use the more work it will take to rinse it off.
-
Set the “Timer” dial for washing action: 9 for slightly dirty clothing, 12 for normal dirty, 15 for heavily dirty. This corresponds approximately to minutes (“15” is 17:45 min). You can always start it again if you think it needs more time.
-
Let it wash until the timer is down to zero.
-
Set the valve dial to “drain” to remove the washing water.
-
Rinse the washed items. Either do it manually using the hose, bucket and drain next to the washing machine. Or set the valve dial to “Wash / Rinse” again, add more water, wash for some minutes using the washing timer dial, and drain again. You will have to rinse twice if you do not do it manually. *To be sure that all the soap is out of your clothes, then rinse them manually by setting the machine to drain and raising up each piece rinse with the hose as you ease it over to the spin bucket on the right side of the machine.
-
Put the clothing into the machine’s right bucket, add the flexible plastic sheet found in the bucket on top of the clothing, and close the lid of the bucket tightly (so that the latch actually catches).
-
Set the spin timer dial and let it spin until finished. You will have to hold the machine in place while it spins - like all old washing machines, it “walk” away from the wall and could even pull out the plug if unattended.
-
Hang your clothes on the lines on the back patio.
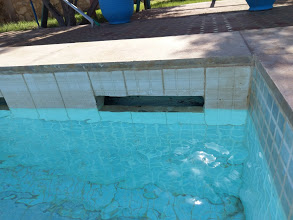
2.6. Pool maintenance
Cleaning the floor
This is done using a robot ![]() Just clean the shallow area and along the edges with the long broom found near the pool, Connect the robot with Electricity, and leave it to clean.
Just clean the shallow area and along the edges with the long broom found near the pool, Connect the robot with Electricity, and leave it to clean.
Make sure to tie the robot’s power supply box to a chair or something stable so it doesn’t get drawn inside the water.

Maintaining long-acting chlorine supply
-
Every day (or every two days), unscrew the lid of the tube at one of the corners at the shallow end of the pool.
-
Take out the plastic net and plastic insert.
-
Clean the net from grass, algae and debris.
-
If necessary (when the tabs are >70% gone, about every 7-10 days), put in two new tabs of long-acting chlorine from the chlorine tab bucket below the stairs of the house. Put it into the center of the plastic net, place the plastic insert on top, fold the net around out and dump all into the tube.
-
And close that tube again.
Testing chlorine and pH levels
The product used for this is the AXTON chlorine and pH analysis kit.
-
Check when the color of the water visually changes, or wait for at most 10 days.
-
Rinse the test tubes, then fill them with a water sample from a depth of 40 cm, and away from the water discharge.
-
Adjust the water level in the test tubes to the mark on the tubes.
-
Add four (4) drops of liquid from the yellow-lid bottle (chlorine test solution) into the yellow test tube, and four (4) drops of liquid from the red-lid bottle (pH test solution) into the red test tube. Take care, the chlorine test solution contains 3.5% hydrochloric acid, which can cause skin burns.
-
Put the lids on the tubes and shake to mix.
-
Compare with the scales at the side of the test tube. (The ideal chlorine level is 1.0 - 1.5 mg/l, or 1.5 - 2.0 mg/l according to the container of fast-acting chlorine. The ideal pH level is 7.2 - 7.6. Determine the chlorine reading quickly, as the yellow color will fade. It is hard to determine the correct reading between 1.0 and 3.0 mg/l of chlorine. In that case, you can replace half the yellow solution with tap water, shake, check again, and multiply the result by two. It is also hard to determine the pH reading – here, the color is relevant, not the amount of transparency. If the liquid is pink, pH is too high.)
-
If the pH value is out of its optimum range (7.2 - 7.6 pH): adjust with solution from the 30 l can from the room below the stairs, as instructed below.
-
If the chlorine value is very low (say, <0.5 mg/l) and after adjusting pH and waiting two hours for the acid to diffuse: measure chlorine level again and adjust with fast-acting chlorine as instructed below.
Source: usage instructions for the AXTON test kit, accessible as PDF from here and translated to English. And some experience values / tips.
Adjusting the pH level
-
If pH is too high according to the test kit, calculate how much acid to add: add 0.3 l to decrease the pH from 7.8 to 7.3, or add 1.25 l to decrease the pH from 8.3 to 7.3.
(The first is according to the instructions on the back of the can, which read: 0.1 l decrease the pH by 0.5 in 10 m² of water (and then combining with the chlorine dosing which, by experience, resulted in assuming a volume of ca. 30 m³ water). Since pH is a decadic logarithmic scale, these instructions only apply for the 0.5 pH neighboring the optimum value, which we assume here as 7.4 pH (the middle of the optimum range of 7.2 - 7.6 pH). So 0.3 l solution will decrease the pH by 0.5 pH (half an order of magnitude, which means a factor of sqrt(10) = 3.16 in ion concentration). For the next 0.5 pH, the ion concentration increases again by a factor of sqrt(10) = 3.16, so 3.16 times more liquid is needed to decrease from 8.3 to 7.8. Taken together, 0.3 l + (0.3 l * 3.16) = 1.25 l is needed to decrease pH from 8.3 to 7.3.)
-
Put a glass jar (for stable stand) on the edge of the pool with a mark of the amount of liquid you want to measure.
-
Wear the pink rubber gloves, safety glasses (or sun glasses) and long clothing for safety.
-
Pour acid from the 30 l can with “pH minus” solution into the glass jar until the mark. The can is found in the small room below the stairs.
-
Pour the glass jar into a bucket with 5-10 l water to dilute it before pouring it into the pool (so that sprinkles are less dangerous).
-
Pour that bucket of liquid into the pool.
-
Rinse the jar, bucket and work area with water from the pool to dilute any acid sprinkles.
Touching the acid is dangerous and can cause severe burns. Wear proper protective equipment, and in case anything gets on your skin, eyes or clothes, rinse it immediately with lots of water to dilute it. If you dilute it enough, it can no longer act and will not cause skin burns.
Adjusting the chlorine level
-
Make sure you adjusted the pH level first. Chlorine adjustment does not work if pH is too high.
-
Take the bucket with short-acting chlorine powder from the room below the stairs.
-
Wear waterproof gloves (or improvise with plastic bags) and safety glasses (or improvise with sunglasses), and ensure good ventilation (work outdoors). Take care to stand off-wind from the bucket and water / powder mixture, to not inhale the dust or fumes.
-
Calculate how much powder you need: 30 g for each 0.1 mg/l concentration increase that you need, up to a proposed target of 2.0 mg/l. (These are experience values, repeatedly confirmed for the pool. See below for the official dosing recommendations on the bucket.)
-
Measure the powder with the “chlorine / oxygen” scales of the dosing container that is inside the chlorine bucket.
-
Mix the powder with water, using a cut-off 5 l can and a long wooden stick, then pour that into the pool.
-
Wash your hands thoroughly, just in case.
The product used is Ocedis Chlore Poudre 5 kg (without stabilizer), see also the full Ocedis chlorine product range. Usage instructions are as follows (from the back of the container, translated to English):
- Use 10 g / 10 m³ in the skimmer or the chlorine doser every 7 to 10 days according to the temperature and the duration of the filtration.
- 10 g / 10m³ results in a chlorine increase of 1.0 mg/l (DPD1).
- Maintain the chlorine level between 1.5 and 2.0 mg/l.
- Water measurements should be done once a week.
- Caution: never put in direct contact with any synthetic lining.
Valve controls: Default setting
The pumps are located in the small underground room with the metal lid next to the pool.
The default setting, which should be active when not doing any special situation, is as follows. It is assumed as initial setting in all instructions below.
- The handle is on “Filter”.
- Valve no. 1 is open (vertical).
- Valve no. 2 is closed (vertical).
- Power is turned on.
(This is what @hazem was told and how we found the pump settings in the room. It does not conform to the description on the control box door though, which reads: "Situation normal: filtration; 3,2 et 5 ouvert; 4 fermé; orange fermé; 1 fermé. In addition, the lid instructions mention: Always either ( “no. 1 open, no. 2 closed” or “no. 1 closed, no. 2 open” ), and ( “no. 5-6 open” or “no. 4 open” ). Do not use no. 4 (means, do not open it). Do not adjust the water level when there are no guests in the house (means, do not decrease it).)
Valve usage: Washing the filters
In order to flush the the filters:
- Turn off the power.
- Change valves no. 1 and 2. to horizontal positions (means 1 closed , 2 opened).
- Change the handle to “Spülen”.
- Turn on the power.
- Wait to see the dust coming in the water sample till it is dusty and not clear.
- Turn off the power.
- Change the handle to “Rinse”.
- Turn on the power.
- Wait to see the water is getting clearer.
- Turn off the power and repeat this cycle 2-3 times.
- Set everything to the default setting before leaving (valves no. 1 and 2 vertical, handle on “Filter”, power on).
Valve usage: Adjusting the water level
Make sure that the water level is correct: it should be in the middle of the holes as seen in the picture below.
To add water: there is a water valve at the garden wall, next to the pool and close to the ground. Open it to let the water increase – the rate is ca. 1 cm in 15 minutes.
To take out water: The simplest is to take water out with a bucket. But you can also use the valves, starting from the default setting as described above:
- Turn off the power.
- Open valve no. 6 (the orange one).
- Close all other valves (1-5), means close valve no. 1, and valves no. 2 and 5 if open.
- Turn on the power.
- Wait for the water level to decrease, which can take some time.
- Turn off the power.
- Set the valves to the default settings again (no. 1 open, no. 2 closed).
- Turn on the power.
(This conforms to the description on the control box lid, which reads: "Aspiration: 6 orange ouvert uniquement; 4-5 fermé. The original description, which simply does not work, was: You can also open the drain valve (“no. 2”) in the pump station room right next to the pool (with the metal lid), and then wait for the solar pumps to do their work, which can take a bit of patience.)
2.7. Garden maintenance
The vegetable / herbal garden to the right after entering the gate needs to be watered every afternoon / evening (as in “going through each row ten times with the hose”). A gardener comes every day (morning or afternoon) to do this. Of course we can help him with that.
Apart from the vegetable / herbal garden, the plants are “maintenance free”. The trees etc. do not require irrigation.
2.8. Mobile phone and mobile Internet use
There are two cellphone towers in Sidi Kaouki, right here, close to the center. They include Maroc Telecom antennas, probably also Orange antennas and others.
Mobile network signal level within the house varies with position, but in the first level living hall it is generally very low for Orange and low to medium for Maroc Telecom. This is caused by the three walls the signal has to cross on the way to the cell tower.
For Maroc Telecom, the following is our “best practice”:
-
Mobile phone calls. Network strength is sufficient anywhere in the house for phone calls. If not, move more to the north (Sidi Kaouki facing) side, or up one level. On the rooftop, you have perfect reception.
-
Mobile Internet. Network strength is often not sufficient for mobile Internet use (typically only an unreliable and slow 2.5G “EDGE” data connection in the first level living hall, sometimes stable HSDPA with Maroc Telecom though). If you want reliable mobile Internet, for example during the occasional blackouts of the House’s main Internet connection, simply put a mobile phone into “hotspot” mode and place it inside a window on the north (Sidi Kaouki facing) side. Then connect to that device by wifi from your computer in the living room or one of the apartments. Also, you have perfect 4G / LTE network signal strength on the rooftop.
2.9. Fixing issues with the electricity supply
If anything breaks, we can call the “house handyman”. The phone number is in the section with protected information below. The grid connection is made at the electrical mast next to the main gate, and from there a cable goes to the main fuse box, to the left after entering the Locale Technique room. Following along the wires from there:
- Fuse, top row, no. 1 from left. Labeled P. Probably leads to some pump. [TODO: find out and confirm]
- Fuse, top row, no. 2 from left. Probably connects to the auxiliary fuse box in the corner of the Locale Technique room. [TODO: confirm] Which contains:
- Aux box, left. Main pump or solar collector circulation pump. Connected with teh ocket below the fuse. [TODO: confirm]
- Aux box, right. Main pump or solar collector circulation pump. Connected with teh ocket below the fuse. [TODO: confirm]
- Fuse, top row, no. 3-4 from left. Room lighting in the Locale Technique room. Not labeled on the fuse itself, but this means that the last label on the inside door of the fuse box refers to this fuse. Which indeed it does (mentioning “room lighting”).
- Fuse, top row, no. 5-6 from left. [TODO]
- Fuse, bottom row. The “big main fuse” for the complete House, an overhead line leads to apartment 4 and / or with a blue buried line may also lead to the house [TODO: to be found out]. Devices after that:
- Fuses in the main living hall fuse box.
- Fuses in other fuse boxes. [TODO: Find out if there are any other fuses]
- Switch and indicator lamps. On the door of the main fuse box, with unclear usage. The switch is normally in the right position (out of “left, center, right”) and all indicator lamps are normally off.
All fuses are normally closed (up position). We have not yet seen a fuse that was open (down position) when we came.
2.10. Fixing issues with the water supply
If anything breaks, we can call the “house handyman”. The phone number is in the section with protected information below.
Water installation. Way of the water from the well to the taps:
-
Water well. All tap water in the House is supplied by a well next to the swimming pool, below the solar panels. That well has its own pump installed, probably inside the well. However that is not the pump supplying the rooftop water tank, according to the House’s handyman. So we assume that the pump in the well pumps water to the cistern in front of the “Locale Technique” room.
-
Cistern. Water is stored in a cistern below the “Local Technique” room. The concrete slabs in front of that room are access ports for it, but were recently cemented in by the gardener.
-
Main water pump. There is a water pump mounted to the floor in the “Locale Technique” room, pumping water from the cistern to the red pressure vessel next to the door. It starts and stops automatically, based on pipe pressure in its high-pressure side, equivalent to water pressure in the house. The pressure sensor sits next to it and also has a mechanical pressure gauge attached that normally shows around 2.0 bars. It engages the pump at 1.6 bars and stops the pump at 2.6 bars.
-
Red pressure vessel. The water from the pump, around 30-50 l at each time the pump runs, is stored in a red 100 l pressure vessel next to the Locale Technique door. By pressing the water in, the air above it is compressed, providing the water pressure in the house. So when opening a tap in the house, the pump will not immediately start, only after the supply pressure falls below 1.6 bar.
-
Water filter. In the high-pressure line after the water pump, there is a device looking like a large glass jar. That’s the water filter. It normally should have a filter unit inside that, from time to time, has to be replaced (or rinsed, depending on the type). Better let the House handyman do that, as we do not exactly now how (yet). However, our best guess is this: first switch off the fuse connecting the pump on the floor of the Locale Technique room, and also close the water valves in the corner going to the red and black flexible plastic tubes (to the house and to the rooftop solar heater, respectively). If you don’t do this, water from the pump (which will start due to the pressure drop when opening the filter case) and then all the water stored in the water heater and water lines will flow into the room. Then open the filter case, letting the water run out (and not on the cables …).
-
Water softener. After the water filter, the water goes through a water softener / decalcifier system (the big white plastic box with an electronic valve control box at the top). In normal operation, water will simply be pumped through this machine and have its magnesium and calcium icons recplaced by sodium on the go. When connected to electricity, it will also perform its “recharge cycles” to regenerate its water softening capability of the blue “mineral tank” inside. For details, see the section below.
-
For hot water: solar water heater. From the high-pressure side, a red flexible tube goes to the outside and up on the “Local Technique” room’s roof to the solar water heater. Another tube covered in black insulating material comes down from there again and goes to the hot water taps in the first floor. This way, water coming down through the riser tube from the rooftop water tank is used to pressurize the hot water line and to push water through the solar water heater.
The solar water heater has a small hot water buffer tank attached to its solar collector panel, and a small electrical pump inside. The buffer tank is always full, as cold water will flow in while taking out hot water. The pump is for circulating heat transfer fluid in a closed loop (or maybe tank water in an open loop) between the panel and the buffer tank. The pump is not for pressurizing the hot water supply, because if it does not work, the water will still flow out of the taps but be cold (we had that issue once). This pump is connected to a socket in the “Locale Technique” room (left after entry, in the corner). -
Water plumbing.
-
Hot water comes out of the solar collector’s buffer tank in a tube covered in black insulating material, goes into and out of the “Local Technique” room, into the ground, out of the ground close to the house wall, then rises through a rainwater tube along the house wall, enters through the wall in the first floor and goes to all the hot water taps there.
-
Cold water comes down gravity-pressurized through a separate tube from the rooftop water tank. It is visible as a large black plastic tube inside the rainwater tube that also contains the rising hot water line. From there, it seems to go around the house, with all the ground level apartments connected this way.
-
-
Electrical water heaters. In the ground level apartments, hot water is only supplied by 1.2 kW electrical water heaters with a buffer tank. One of these has been newly installed in each of the apartments when we arrived. They are mounted inline, after a junction from the coldwater line. This means, the water is also gravity-pressurized from the rooftop water tank.
Additionally, there is a connection between the high-pressure and low-pressure tubing in the “Locale Technique” room, with a closed valve in between that is secured closed with wire. Do not open this, as it will cause all water in the rooftop water tank to flow back into the cistern. It’s meant for maintenance work on the rooftop water tank and piping system, obviously.
Note that the House’s water system does not include the rooftop water tank (not anymore – this was changed recently). This can be seen from the fact that the pressure gauge shows 1.6 - 2.6 bar, equivalent to 16 - 26 m storage height, while the tank is only 8 m high. Also, the pressure changes quickly and for up to one bar when the pump is running, which is impossible when it would be static pressure from the water tank.
The rooftop water tank is still in use, but only for the gardening water spouts. It probably replaced the small water tank on the garage area, which is now no longer in use.
2.11. Maintaining the water softener
The water softener is the large white plastic box machine in the Locale Technique room. For a good introduction how water softener work, see this article by Popular Mechanics. In the system here, the “mineral tank” is the blue pressure vessel inside, and the “float and valve assembly” is the thinner cylindrical piece inside. The whole plastic box containing both also doubles as the brine tank (which means, you refill the salt here). This water softener is readily installed and has been in use already (two labels by the manufacturer about “something not being installed” remain, but these were just not removed during the installation and can be ignored). Operation and maintenance:
-
Normal operation. During normal operation, the valve controller will show three different screens with information: remaining capacity in m³ until next regeneration, current time, and current throughput in liters per minute. You can cycle through them with the NEXT key. In this mode, the air pressure in the red pressure vessel next to the door simply pushes water through the blue mineral tank when any tap is open, and on its way through the plastic beads inside it, the calcium and magnesium ions stick to the beads and sodium ions from the beads go into solution in the water (“ion exchange”). The machine does not use electrical power in this mode, except for its water flow meter that counts water throughput to determine the time of the next regeneration cycle. It will also work when disconnected from power until the mineral tank loses its water regeneration ability and a regeneration cycle is necessary.
-
Filling in salt. The salt comes in salt tablets that are poured into the brine tank. Simply remove the plastic cover and the octagonal lid to access it – its the tank also containing the blue mineral tank and thin cylindrical float and valve assembly. The right amount is filling the tank about half full with salt tablets, checking once monthly and refilling when needed (see here for details). This will be equivalent to 7-10 cm above the water level in the brine tank after a regeneration cycle, as recommended in other sources online.
The valve controller may display a “low salt warning” based on the amount of salt added last time and a programmable amount that is used up per regeneration cycle. We did not find out yet if the machine used here has this feature activated (that is, if it will ever display “SALT FILL”). It is safe to ignore this feature and simply keep the salt tank half full always, checking about once a month. Otherwise, to keep the salt warning feature functional you will have to enter how much salt is in the tank after refilling it, as shown in the manual, p. 16. This seems unnecessary hassle, so let’s just ignore that “feature” even if it exists …
-
Regeneration cycle. Regeneration will happen automatically after a certain amount of water usage, but it can also be manually triggered. To do so: first check that the brine tank contains enough salt. If it does not, fill in salt and wait for at least two hours before initiating a regeneration (this of course makes only sense if there is also any water in the brine tank, so make that sure as well). Then either press the REGEN button shortly and check that “REGEN TODAY” appears in the display – this will trigger delayed regeneration overnight. If you press the REGEN button again shortly, it will cancel the request. You can also trigger an immediate regeneration cycle – for that, press REGEN for three seconds (note, there is no way to cancel such a request). Also, there is no way to stop a regeneration cycle once it is in progress. Source: the manual, p. 14.
The regeneration cycle takes around 75 minutes in total and consists of: 5 min “Rinse”, 60 min “Brine Up”, 4 min rinse, 5 min fill (durations approximate). In all phases there is water flowing outside the room through the orange hose – in the “Brine Up” phase it is with low flow, else with large flow, around 150 l in total. The water flows on the ground outside right now, but a better solution has to be found as it contains dirty and also very salty water.
After a regeneration cycle is complete, the “remaining capacity” screen will show around 20.5 m³ (20,500 l) that can be used until the next regeneration. Since the machine knows the current time, it will do the regeneration at night, except if started manually for immediate execution. This makes sense, because during regeneration, no water softening is possible, so hard water will be supplied to the taps instead (“If there is a demand for water when the system is regenerating, untreated water will be used.”, see manual, p. 14).
-
Configuring the time. If the water softener is without power for more than 24 hours, it will forget the time of day, but remember all other settings. If you cycle through the screens pressing NEXT and on the time screen see the time displayed in a flashing mode, it indicates that it has to be configured. To do so: Press SET CLOCK, adjust the hour setting with the arrow keys, press NEXT, adjust the minute setting with the arrow keys, press NEXT to finish the process. REGEN can be used to go to the previous step in this process. Source: manual, p. 15.
-
Accessing diagnostics information. The valve controller can give access to some diagnostics information: ① days since last regeneration, ② volume since last regeneration, ③ history of remaining volume until next regeneration, for last 7 days, ④ history of daily water usage for last 63 days, ⑤ history of flow rate maximum for last 7 days, ⑥ history of valve operation. To access it, see the manual, p. 17-18.
2.12. Fixing issues with the Internet connection
Fixing connection issues: Recommended steps, in this order:
-
Find and stop the heavy usage. When the Internet connection is “there but very slow”, it is almost exclusively due to some device using the Internet very heavily. You can check ping times:
ping 8.8.8.8(to the Google nameserver) returning average ping times of ~56 ms is “normally fast Internet”, and the typical range for pinging European servers is 82 - 95 ms. Any ping times >150 ms indicate the “slow and unusable Internet” condition. To find the heavy user, in both the upstairs TP-Link router and downstairs TP-Link router you go to “Wireless → Wireless Statistics” and refresh several times to identify the client device whose packet numbers are increasing the fastest. You can then compare the MAC address given there with the MAC addresses of connected devices (keep a list of these, and look up online how to find them in different devices). -
Reboot the wifi routers. Routers that run for weeks without rebooting can become slow due to software errors, so they should be rebooted from time to time. This has been experienced with the downstairs TP-Link router already, but may also be true for the upstairs TP-Link router. You can reboot them from their admin menu interface, or by removing electrical power from them for a second (simply plug the power cable in and out).
-
Reboot the broadband router. The broadband router will also become slow when running for about two weeks without rebooting. In addition, a reboot will create a new mobile broadband connection, which might fix bandwidth issues the old connection had, and often also terminates a heavy Internet usage case (like video streaming or a video call) in the House. To reboot the mobile broadband router, visit its admin interface, go to “Menu → Settings → System → Reboot” and click the “Reboot” button. (To log in, use the default “admin / admin” credentials.) Alternatively and simpler, you can remove electrical power from it for a second by switching fuse no. 18 off and on again (located in the fuse box left after entering the main door to the upstairs living area and labeled accordingly on the inside of that fuse box).
-
Recharge the Orange SIM card. The most common issue is that we exhaust the 40 GiB of monthly included data volume, at which point the Internet connection will stop to work. (The mobile broadband router might still show the connection status as “Connected”, but no data transfer is possible, and after a manual disconnect no new connection is possible.)
To recharge it, you need to activate an “Orange Pass Internet”. The simplest way is to simply buy a suitable Internet package at recharge.orange.ma for phone number+212660767305. It does not need any login, works well with international credit cards, and has an immediate effect. In the current configuration with the Orange Flybox Home mobile broadband router, no manual action is required afterwards – simply wait 3-5 minutes until the router establishes a new connection by itself. (If you want it to happen faster, go to http://192.168.0.254/ and click the “connect/disconnect Internet” button in the top left until a new connection is established.)
Important: Obviously you need an Internet connection to book a new Internet package for the House. So be sure to keep a phone / tablet with a suitable small data package around for such cases (or alternatively, some recharge codes sufficient to buy the smallest single-day Internet package for your mobile device, i.e. 5 MAD). Either go to the rooftop terrace (for proper network strength) and book the new Internet package with the mobile device directly, or place the mobile device in hotspot mode on the rooftop terrace close to the Western windows and then book a new Internet package comfortably from your computer inside the House. Your choice
-
Use another mobile broadband connection. We have a redundant mobile broadband connection available by a second mobile network operator (Maroc Telecom instead of Orange). Maroc Telecom has excellent 4G signal strength at the rooftop of the House. To activate this, let @matthias put his tablet computer into hotspot mode, or use another Android device in hotspot mode.
-
Talk to @matthias. He has some more information about the network, including backup files of the router settings.
-
Call Orange customer support. If necessary, it will work to just call the Orange customer support and tell them the number on our SIM card (
+212660767305). -
Call the network admin. A colleague of our house handyman installed the Internet connection setup in the House. His number is in the section with projected information below.
Internet connection setup:
-
Type. Mobile broadband connection (4G via Orange network) to the next mobile network tower, which is close to the center of Sidi Kaouki, 2.5 km by line of sight.
-
ISP. Mobile network operator “Orange” is our ISP.
-
Contract. The contract with Orange is a one year contract created by our landlord. Start time is unknown, but covers our stay until end of April at least. From 2018-02-01 on, it provides 40 GiB/month of included data volume. For Maroc Telecom, we use Internet packages book on a prepaid SIM card, without no contract runtime.
Local network setup: The House’s LAN is 192.168.0.0/24, and contains all its network devices. Infrastructure devices from top to bottom:
-
Switch. A five-port Fast Ethernet switch model “Tenda S105” on the rooftop, on top of the water tank. Four ports are used, one for each of the three routers and one for the video recording system.
-
Router “rooftop” (192.168.0.254). A router on the rooftop, on top of the water tank. Model Huawei B310s-22 branded as “Orange Flybox Home”. Admin interface is http://192.168.0.254/, user “
admin”, password “admin”. It has multiple roles: (1) mobile broadband router, with the SIM card inserted directly into it, (2) DHCP server for the whole LAN. Wifi has been disabled in this router. The router is very probably SIM locked to Orange SIM cards only. -
Router “living hall” (192.168.0.253). Located in a corner in the living hall. Admin interface is http://192.168.0.253/, user “
admin”, password “admin”. Provides wifi in the first floor with SSID “DAR NEZHA”. Also has free Ethernet ports to connect to the Internet by cable. Since this router’s wifi and Ethernet clients should be in the same network as the rest of the House, the blue Ethernet cable going to the “rooftop” router has to go into one of the four orange Ethernet ports, not into the WAN port. The connection to the rooftop switch is made with a cable that goes straight through the outer wall into a small distribution box on the outside, and then, in a gray tube, along the wall and up to the rooftop. -
Router “apartment 1” (192.168.0.252). A small box in apartment 1, near the window. Model TP-LINK TL-MR3020. Admin interface is http://192.168.0.252/, user “
admin”, password “admin”. provides wifi downstairs and around the pool area with SSID “DAR NEZHA AP1”. The connection to the rooftop switch is made with a cable that goes through the window frame and then in a gray tube along the wall until it joins the same tube as the cable coming from the “living hall” router.
2.13. Dealing with injuries and sickness
Medical emergencies.
- There is a hospital in Essaouira that should have an emergency unit open 24 hours a day.
- To arrange transport to Essaouira in case of emergencies, the simplest and fastest way is to call the numbers of taxi drivers we have collected. (See the paper on the main door resp. the list below).
- Our POI map contains pharmacies in the local area.
- For other medical facilities Essaouira, consult this Essaouira health services directory. (Do not rely on this for emergencies, as listings might be inaccurate and locations might be approximate.)
Small injuries and common sicknesses. We have a kit of first aid supplies and medications in the house. The list has been put together by @HadeerGhareeb and it is managed together with supply status and some usage instructions in the Our Pharmacy wiki.
2.14. Toilet
This part is mainly for people coming from most Arab countries, There is no “shatafa” (Egyptian name) in the toilet, so either bring your portable one, or get used not to use one ![]()
[text-direction=rtl]للعلم بالشىء لا يوجد “شطافة” فى الحمام[/text-direction]
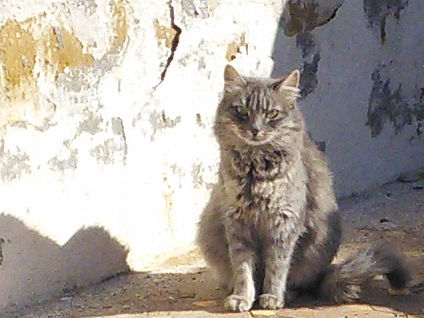
2.15. Cat
There is a cat that comes to eat at the House.
3. Actions out of the House
We use this map to map all relevant points of interest in the local area. It is using uMap, an OpenStreetMap based service, and you should add other points of interest as you come across them (instructions).
3.1. Getting local currency
There are a lot of ATMs in Essaouira, esp. in the Madina (walled old city) and its neighborhood, and so far only one of them had issues with an international credit card. There are also several banks that offer currency exchange (usually advertised on their sign).
See Essaouira POIs map for ATM and bank locations.
3.2. Shopping in Sidi Kaouki
Remember to check our food shopping list for anything you could bring along for the House. Mark your purchased items as completed in Dynalist. See our Dynalist instruction manual for this and other instructions.
There are five small shops in Sidi Kaouki, close to the center:
-
“left of three” shop (opening times: always open on Fridays; TODO)
- fruits: various
- vegetables: various
- [TODO: remaining products]
-
“center of three” shop (opens ca. 9:30, sometimes 9:45, sometimes much later due to bad weather; always open on Fridays)
- bread: Moroccan bread for our breakfast (only here!). 1.20 MAD per piece.
- fruits: oranges, clementines, apples, bananas. (Restocked every few days.)
- vegetables: potatoes, carrots, tomatoes, onions. (Restocked every few days.)
- water: 1 l bottles, 5 l cans
- other: eggs, tuna cans, salt, cooking oil, …
- [TODO: remaining products]
-
“right of three” shop (opening times: always open on Fridays; TODO)
- [TODO: remaining products]
-
“remote” shop (opening times: TODO)
- [TODO: remaining products]
-
“between the restaurants” shop (opening times: TODO)
- mostly sweets / refreshments for beach visitors
- [TODO: remaining products]
3.3. Shopping in the local area (Essaouira, Gazhoua, Smimou)
Shop along our shopping list (which is just a search for #shopping -is:completed in our dynalist). Mark your purchased items as completed in Dynalist. See our Dynalist instruction manual for this and other instructions.
We have marked all potentially interesting shops and markets on our Essaouira POIs map, but the following points deserve a longer description:
Shops and Markets
-
Essaouira flea market. There is a flea market in Essaouira every Sunday from (early?) morning to early afternoon (the first sellers start to pack around 14:30). Location is along Avenue Molay Hicham, from here to here. You find all kind of new / old / broken tools, household items, bicycle parts and accessories, bicycles, electronics and also some clothing and food items. The northern quarter is a fruit / vegetable market.
-
Essaouira junk street. Many small shops and a whole squatter area around this street. Mostly selling salvaged items and materials, including doors and windows, tools, household items and utter junk. The squatter area is also home to two or three art galleries / showrooms by local artists (see our POI map for locations).
-
Smimou food market. Reportedly there is a market for food every Sunday in Smimou, a town 24 km south of the House. We did not visit this yet, but it seems that the local prefer to go there instead of to Gazhoua or Essaouira. To get there, you can take the microbus from Sidi Kaouki (see section “Reaching the House → From Sidi Kaouki”), ideally catching it right in front of the House.
-
Avito small ads. Avito is Marocco’s largest online portal for small ads. The Essaouira province alone has hundreds of them across all kinds of used goods.
-
Essaouira yellowpages. The website essaouira.madeinmedina.com provides the most complete business and services directory that we have found so far for Essaouira. In our experience, it’s map locations are often only approximately right: if you don’t find there what you are looking for, ask around, it might simply be 200 m away.
3.4. Shopping from major cities and from abroad
Somewhat special tools, electronics and food items are not available in the local area, but some can be obtained via online shopping inside Morocco and others can be brought by people coming to the House (“piggybacking logistics”).
Online shopping in Morocco
There are not too many options, but we made good experiences with the following already:
- iris. Large Moroccan webshop for computer / photo / video / audio electronics and similar. They may decline the first order when ordering from Sidi Kaouki, but then just contact them about it and they will organize shipping to the nearest post office in Smimou from where you can pick up the delivery.
Remote shopping: Requesting something
- Add the item to our dynalist and tag it
#remote-shopping. If it is potentially available in the local area, it does not hurt tagging it#shoppingas well. - Add a note section to the item explaining where to buy it or where to order it online etc…
- Add a
#by-usernametag to the Dynalist item as well so the person getting the item for you can ask for clarifications when needed and knows how to get reimbursed for the costs. - Do not forget to settle the expense when your item arrives.
See our Dynalist instruction manual for general instructions.
Remote shopping: Bringing something
-
Before you travel to the House, please check our “remote shopping” list for anything useful you can bring in. Since some items might have to be ordered online, from abroad even, ideally check two weeks in advance and then again later for short-notice requests.
-
Ask the person requiring an item for clarifications if needed (esp. for higher expenses and when you suspect the list might no be up to date). The list item in Dynalist should contain contact information, usually as a tag
#by-usernamecontaining an edgeryders.eu username. In such a case, search for the username on edgeryders.eu and send them a direct message there to contact them. -
Purchase the item, or let the person requesting it order it online and have it sent to your address.
-
Immediately after purchasing, mark the item as “completed” in Dynalist (“press Ctrl + Return”).
-
Settle the expense with the person requesting them item when you come to the House.
See our Dynalist instruction manual for general instructions.
3.5. Getting and setting up a local SIM card
In short, these are the steps to use phone calls and mobile Internet with a local Moroccan SIM card. If you need more details, you can ask @matthias.
-
Buy a Maroc Telecom SIM card. Maroc Telecom has the best network around the House, and in general in Morocco. (The two other networks are Inwi and Orange; Inwi works well around the House but offers no 4G service. Orange works only on the rooftop.) Filter our Essaouira POIs map for “SIM” to see the shops selling Maroc Telecom etc. SIM cards. They cost 30 MAD, and there is no need for a passport or other documents when buying them. We also have a few Maroc Telecom SIM cards available in the House for visitors.
-
Buy recharge cards for Maroc Telecom SIM cards. See our location map for shops that have them. Get a 50 MAD card for each month of your stay if you want permanent mobile Internet, and some 10-20 MAD cards for phone calls balance depending on usage. Also, we should have some recharge cards around in the House.
Alternative recharge methods are “express recharge” in shops (of either phone or Internet balance), or online recharge. Regarding online recharge, recharge.com works (credit card, or if that fails PayPal) but takes a 20% commission fee. Also prepaidunion.com offers recharge with Paypal (tested, successfully) and all major credit cards (not tested yet). There are more third party services, which we have not yet tested. Whereas the official Maroc Telecom Online Recharge does not work with international credit cards, which is their only payment option suitable for travellers.
-
Activate the SIM card. Insert it into a phone, call anyone, and press
0when you hear the voice menu prompt. After that, the SIM card is active, and your call will be executed as normal. -
Recharge your phone call balance. Send a SMS to number
555and as content the recharge code from your card (for example48107139762872). You will immediately receive a SMS confirming the recharge (“Votre compte Jawal a été recharge de …DH”). -
Book a mobile Internet package.
-
Choose a recharge card. The card’s recharge amount determines which package you book. For permanent Internet access, choose a 50 MAD card, which gives you a 5 GiB package for 30 days and is the smallest package valid that long. See also the full list of Internet packages.
-
Send a SMS to number
555and as content the recharge code from your card followed by*3to indicate you want to book an Internet package. So for example,48107139762872*3 -
You will receive a SMS immediately, confirming your booking.
-
-
Set up mobile Internet settings. Check the APN settings of your mobile device’s mobile Internet configuration. If it has an active APN configuration with APN
www.iamgprs1.mathen the automatic configuration was successful. Otherwise, create and then enable that APN configuration manually with:- APN:
www.iamgprs1.ma - username: leave empty
- password: leave empty
- other fields: leave at default values
- APN:
-
Both phone calls and mobile Internet should now work. Mobile Internet will stop working once the runtime or data volume of your Internet package runs out, so keep a suitable recharge card with you to renew it.
3.6. Using our Points of Interest map
While exploring the local area and trying to find the right shops, we created a digital map with our findings: our uMap “Essaouira POIs”.
We have documented the processes of creating, extending and maintaining such a map in its own topic:
3.7. Using the bicycles
We have four bicycles that “came with the house”. Of course we have to treat them carefully as they are effectively rented. Sidi Kaouki is a harsh environment for the bicycles, so here are a few hints how to treat them right:
-
Store the bicycles under the roof next to the garage. Far enough in so that combined ranin and wind can’t make them wet.
-
Do not use the bicycle at the beach, except you know what you are doing. (Driving the bicycle on hard, wet sand does not bring any sand into the drivetrain, so it’s ok but anything else is not.)
-
Do not drive over thorny branches. (We had one tire punctured by four thorns at once already.)
-
Clean and oil the chain after heavy offroad use.
-
Tell @matthias if you notice defects.
3.8. Getting drinking water
You can get drinking water from several sources in the local area. By preference:
-
Well near the mosque (location). Our preferred well. It is more far than the Iskoha well, but the road is paved and the terrain is flat. The well is served from the water tower 20 m from it, and there is a mechanism to adjust the water pressure inside the water tower (in the downstairs area). So in case the tap pressure is very low, it may just be a wrong setting of this valve. It is set to “low to medium” normally, maybe to prevent water overconsumption

-
Well in Iskoha (location). There is no sign about drinking water at this well, but we were referred here by a local when the well near the school was dry.
-
Well near the school (location). Served by a very visible, large water tower ca. 200 m from it. This water tower also serves the whole water network in this part of the village, probably including the well in Iskoha. Because that well went dry once shortly after the well at the school went dry, and there are service manholes along the track from the water tower to the Iskoha well, indicating there is a water line dug in.
-
Shops in Sidi Kaouki. The left and center shops sell drinking water in 5 l cans. Both shops have both brands: the square can for 10 MAD per 5 l, the round can for 12 MAD per 5 l.
All wells can be periodically dry / out of service. In that case, check back after a few days. The well water is slightly salty, but well drinkable.
4. Leaving the House
4.1. To Sidi Kaouki
There are multiple transport options ![]()
-
By bicycle. You can take one of our four bicycles. Take the lock and lock the bicycle in the center of Sidi Kaouki while you are in Essaouira, Gazhoua, or leave to an airport. The lock combination is
1632(red lock) and0008(black lock). -
By walking. To the center (bus station etc.) it takes pretty exactly 30 minutes of moderate to fast walking.
-
By hitchhiking. Same as in section “From Sidi Kaouki”, which see.
-
By microbus. The bus passes by our house four times a day and proceeds from Sidi Kaouki center to Essaouira. For details and its schedule see section “To Gazhoua and Essaouira”.
4.2. To Gazhoua and Essaouira
For all major purchases etc. we have to go to either to Gazhoua (closest smaller city, has a large supermarket and some shops) or to Essaouira (closest larger city, ca. 70.000 inhabitants).
From our house to Essaouira you have the same transport options as from Essaouira to Sidi Kaouki. These also apply to Gazhoua, which is on the way to Essaouira.
-
By bus. Leaves from the center of Sidi Kaouki. The schedule below was made assuming a return departure 40 minutes after starting from Essaouira (could be more, but better we to err on the safe side):
- 8:00 (first bus, confirmed here)
- 10:10 (departure observed 10:10 and 10:15)
- 12:10
- 14:10
- 16:10 (maybe)
- 17:10 (confirmed here by a bus driver, also confirmed by us seeing it 17:35 in Gazhoua)
- 18:10 (last bus according to a local, not confirmed yet; also according to this local source, the bus comes back at 19:10 to Sidi Kaouki but stays here overnight, so this would then indeed be the last bus)
-
By microbus. There are two types of microbuses, each going up to four times. One has a sign “Sidi Mbarek” at the top of its windscreen. You can stop that bus right in front of our house, as it passes there. Bus schedule at our house (assume 5 minutes later in Sidi Kaouki center and ±15 minutes variation):
- 6:25
- 7:25 (between 7:00 and 7:30, according to Habiba)
- 9:25 (observed 9:17, 9:48, 9:50)
- 14:00 (observed 14:05)
- 15:00 (last bus, according to a local; however, that information is probably wrong)
- 15:25
- 16:45 (last bus, according to this source)
-
By grand taxi. They leave from the center of Sidi Kaouki. All sky blue and blue vehicles with a round emblem on the front doors are grand taxis, whether rusty Mercedes cars or new vans. Price is always 100 MAD for the taxi to Essaouira, which is said to be the official rate set by the city, so it will be shared between 1-6 passengers depending on how many you find to join. In the tourist season (starting from April), you can also find a different system: the taxi driver will charge everyone 15 MAD independent of the amount of passengers, and bet on taking in more passengers on the way to fill the car up (which means 6 passengers, as that is what all taxis are allowed to carry, independent of their seat capacity).
The first taxi is only available in Sidi Kaouki after somebody took one from Essaouira. In the morning, we observed no taxis at the following times: 9:55. Also, there are reportedly no taxis in the (late) evening.
4.3. To Essaouira-Mogador Airport
[TODO]
4.4. To Agadir Airport
[TODO]
4.5. To Marrakesh Airport
[TODO]
4.6. To Casablanca Airport
[TODO]
4.7. To airports abroad
[TODO]
