Our shiny, new and complete manual for using the edgeryders.eu website. Covers both general use of our Discourse forum software, and conventions and features only found here. For admin features, see the Discourse Admin Manual.
Content
- 1.1. Signup and login
- 1.2. Completing or changing your profile information
- 1.3. Introduction to the platform’s concepts and features
- 1.4. Why we have our own platform, and it’s different
- 1.5. Netiquette
- 1.6. Security
- 1.7. What if my written English is not that good?
2. Reading, posting and connecting
- 2.1. Browsing through topics
- 2.2. Using the search field to find stuff and people
- 2.3. Creating posts
- 2.4. Editing existing content
- 2.5. Commenting (skillfully)
- 2.6. Mentions
- 2.7. Adjusting your on-platform notifications
- 2.8. Adjusting your e-mail notifications
- 2.9. Reaching out through messages
- 2.10. Interacting with other users outside of this platform
- 3.1. Formatting text content
- 3.2. Structuring long or complex content
- 3.3. Adding tables
- 3.4. Adding videos, maps and other embedded content
- 3.5. Adding images
- 3.6. Adding simple graphics with box drawing characters
- 3.7. Adding a collaborative drawing
- 3.8. Adding slides
- 3.9. Adding file attachments
- 3.10. Hiding details and editorial comments
- 3.11. Writing in Arabic and other right-to-left scripts (RTL)
- 3.12. Creating content from existing documents
- 3.13. Creating content with custom formatting
- 4.1. Using categories
- 4.2. Using tags
- 4.3. Creating a wiki
- 4.4. Adding link targets
- 4.5. Adding a table of contents
- 4.6. Creating posts in multiple languages
- 5.1. Deleting your account
- 5.2. Posting links to Discourse topics on Facebook
- 5.3. Making link previews work for embedded videos
- 5.4. Converting a topic to PDF
- 5.5. Following content by RSS
- 5.6. Administration functions and other advanced uses
1. Getting started on the Edgeryders website
The Edgeryders vision is for coalitions for positive change between the vast resources of society’s center, with its corporations and institutions, and the ability and need for “deep innovation” of society’s edges.
Share knowledge, learn from each other and form alliances, through respectful, truth-oriented debate. That’s what the edgeryders.eu platform is for, and this article explains how to use it.
1.1. Signup and login
as of November 2023, we have restored direct signup at edgeryders.eu. Previously, we used a single sign-on website called communities.edgeryders.eu, and accounts created there were valid on several Discourse instances connected with Edgeryders.
When visiting edgeryders.eu, you find the “Login” and “Signup” buttons in the top right and the process only collects a minimum of information. See our Privacy Policy for details.
Detailed instructions for signup, in case you encounter any problems:
-
Start from edgeryders.eu.
-
Click Sign Up in the top right. A signup form will show up.
-
Fill in the signup form. Click Create New Account in the end.
You will arrive at https://communities.edgeryders.eu/u/account-created where it says:
You’re almost done! We sent an activation mail to [user@example.com]. Please follow the instructions in the mail to activate your account.
If it doesn’t arrive, check your spam folder.
-
Check your e-mails to find the activation e-mail. It has the title “[Edgeryders] Confirm your new account”. In case you cannot find your activation e-mail:
- Check the spam folder of your e-mail account.
- Go back to https://communities.edgeryders.eu/u/account-created and click Resend Activation Email.
- Or even click Change Email Adress to try with another e-mail adress.
- If still nothing worked, contact an Edgeryders admin by e-mail for help. You can write to @matthias at matthias@edgeryders.eu.
-
Click the account activation link that you found in the activation e-mail. At that link, you will find a message:
Welcome to Edgeryders!
Click here to activate your account
Click that button of course.
You will now be logged in and see a welcome message to that effect.
Logins do not expire. So except you lose your notebook / phone / tablet, or re-install your browser or operating system, there is no need to ever log in again.
Other details:
-
Logging in with an edgeryders.eu account created before July 2017. In July 2017, we switched to a new software here on edgeryders.eu (from Drupal 7 to Discourse).
Your existing edgeryders.eu login and password keep working as they did. There is one exception: if your username contains anything that is not a Roman letter (a-z, A-Z) or a digit (0-9), better use your registered e-mail address instead of your username to log in. (You can also use your username if you change each of these non-alphanumeric characters to an underscore “
_”. For example,Quíntus-Fabius MaximusbecomesQu_ntus_Fabius_Maximus.)
1.2. Completing or changing your profile information
After the suppression of the SSO site, this is now done directly on the edgeryders.eu forum.
- Click on your avatar on the top right
- Select the “profile” icon at the bottom.
- Enter the changed information in the form that opens.
1.3. Introduction to the platform’s concepts and features
The Edgeryders platform edgeryders.eu is made from open source software – it is based on Discourse, and you can download it from our Github repository is. It will take a bit of getting used to it, but it’s a very modern and user friendly solution we have now. Give it a try! As always, get in touch if you experience any trouble.
Here is an overview of the site’s terminology and navigation:
-
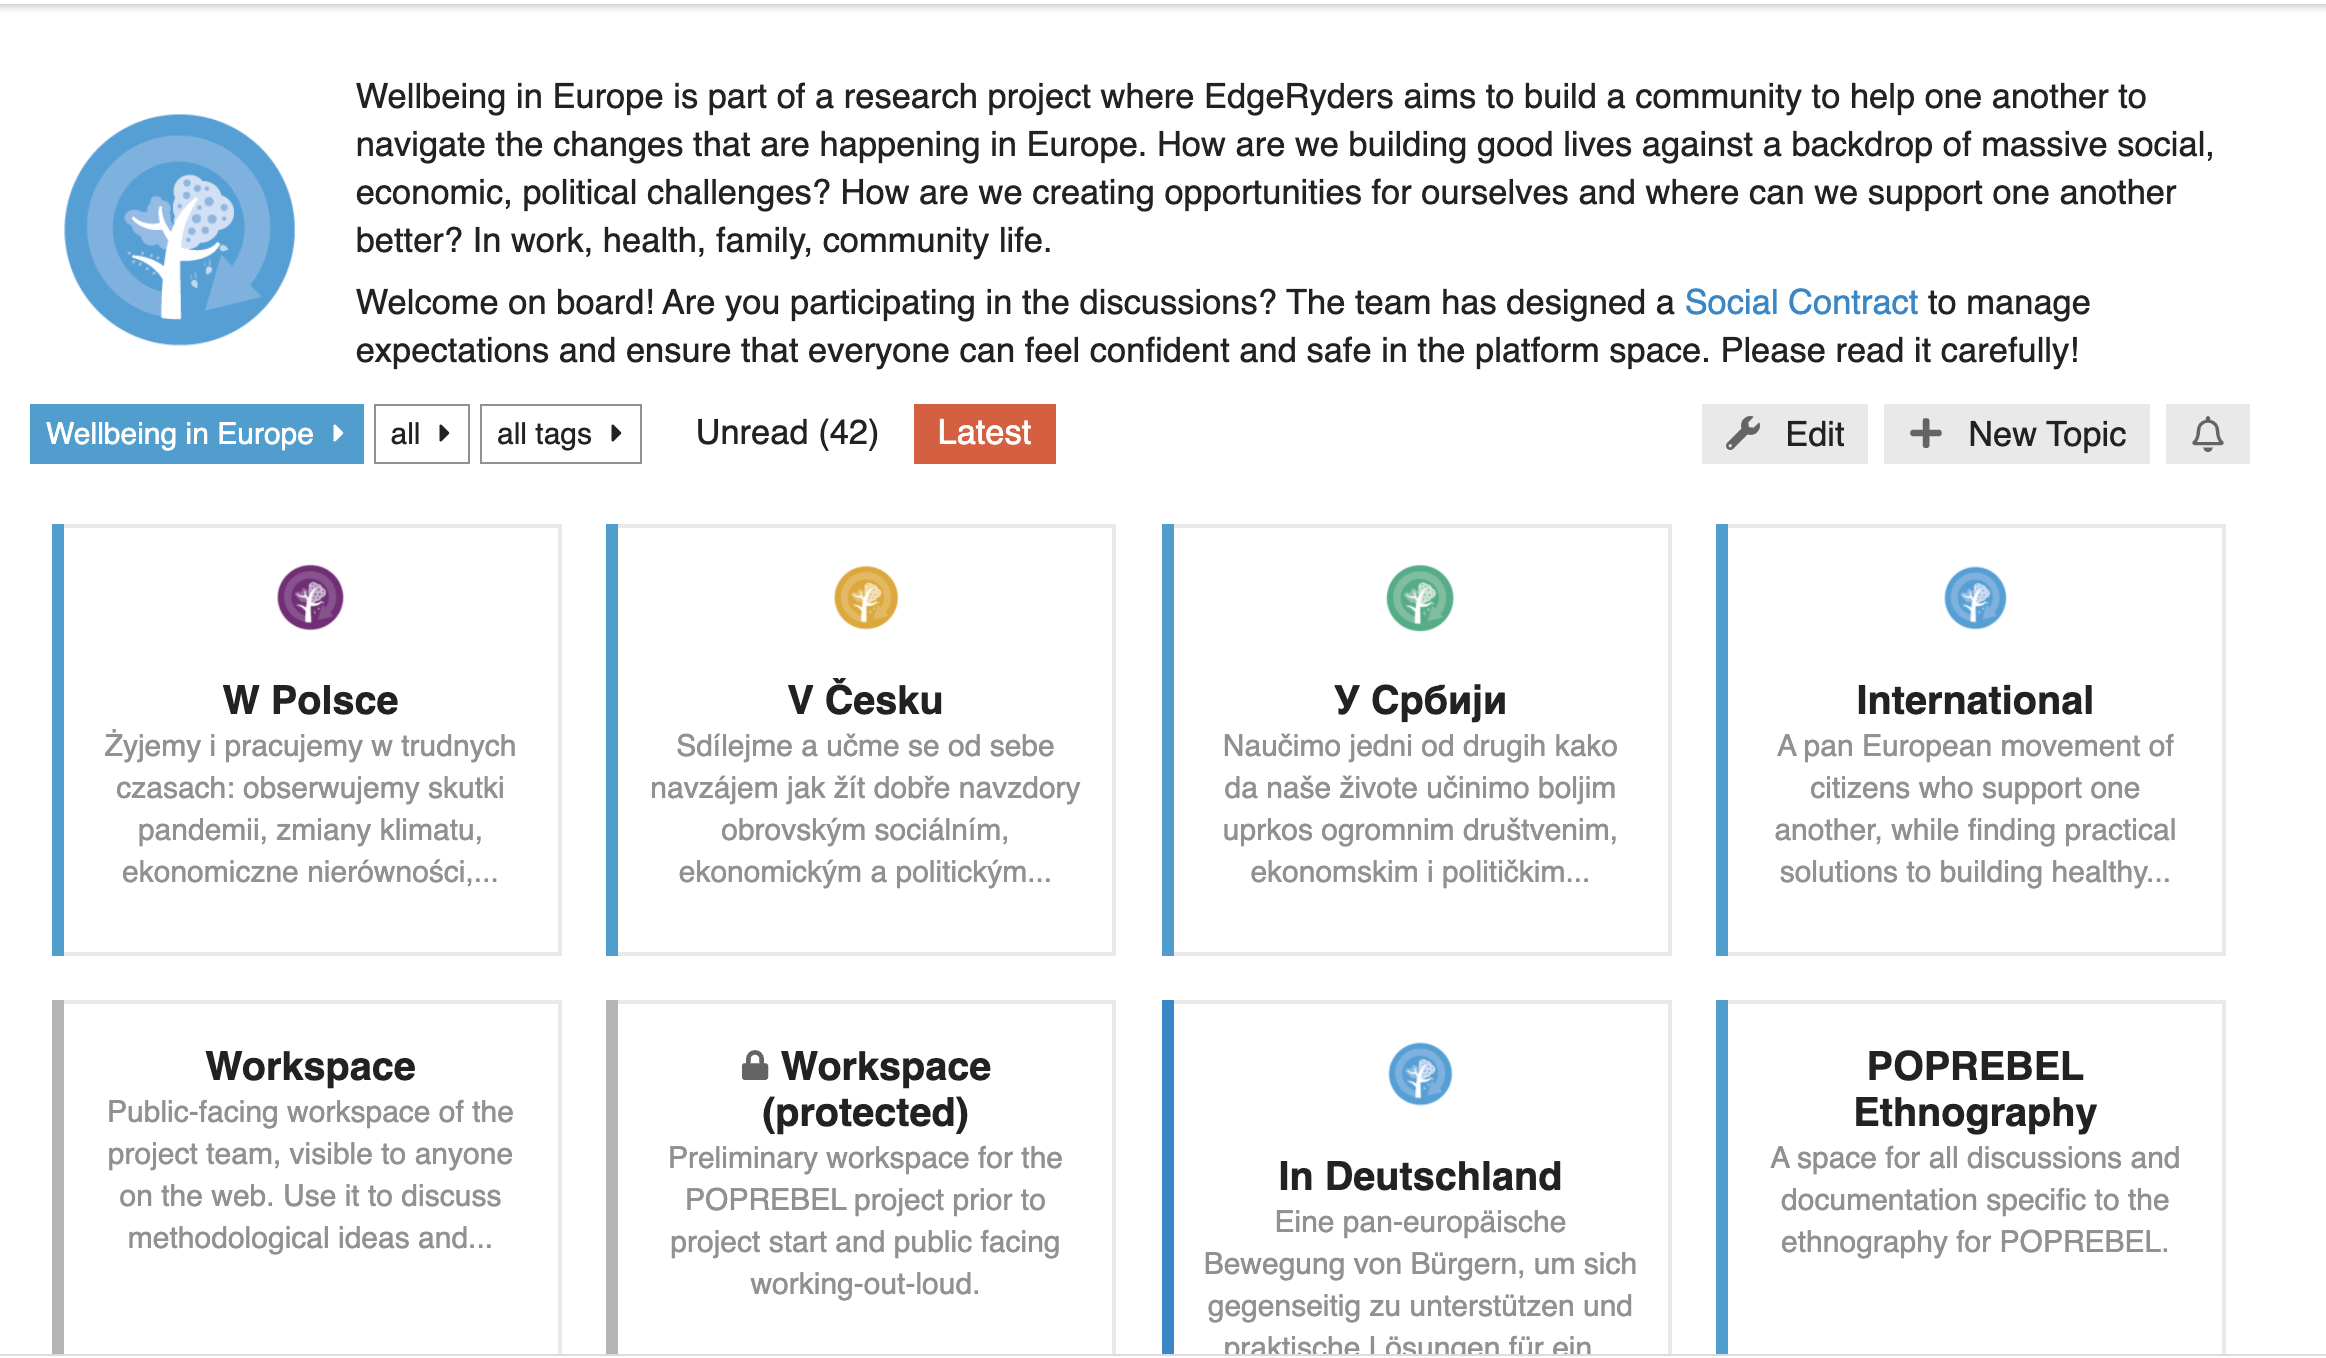
Frontpage. When you first log in, the home page that you see is a listing of our categories, which is the Discourse term for “forums” or “message boards”.
-
Terminology. So forums are called “categories”. A category can also have one level of sub-categories. Within them are topics and within topics are posts. The first post is the one that starts the topic, the others are responses.
-
Horizontal menu. On the frontpage, you see the word Categories highlighted in red and other options in the same horizontal menu. These are different choices for looking at the overall content on the site. Try each one out and see which view is best for which purpose:
- Categories. A list of all categories and sub-categories of the site, forming the content of the frontpage.
- Unread. A list of topics with new responses, where you are participating in the discussion or get notifications from for other reasons.
- New. A list of all topics that were created since your last visit. These are topics in which you are not participating, so they did not already appear in “Unread”. In the beginning this will be a long list because everything on the site is new to you. Close to the lower right side is a Dismiss button that lets you mark everything as “seen.” Do this and all later visits will show you what is new to you since you marked it. Very useful.
- Latest. The most complete view of all recent activity on the site, not limited to what you get notified about. Useful to see what’s happening that might be interesting to join.
-
Hamburger menu. In addition, in your upper right view there is a “hamburger menu” of stacked horizontal lines. The hamburger menu will always be there. Use it as a one-click to navigate to other main categories and site sections when you are inside a topic.
Compared to our old platform we had until July 2017, here is what changed:
-
New content structure. We moved all of the Edgeryders content so that it fits into the categories we created on our re-designed site.
-
We have rolled out an ethical consent funnel. It is a two-questions quiz that replaces the “I agree to the terms and conditions” box to tick. We developed it as a way to make the OpenCare research more ethical, and are now extending it to every corner on Edgeryders. You will only have to answer it once, but until you do the platform will not let you post.
-
We have updated our Terms of Use and Privacy Policy .
-
All external links pointing to individual posts, wikis, events, pages etc. of the old platform still work, and are now redirected to the imported content on the new one. Internal links within the edgeryders.eu platform have been adapted to point directly to the new content.
-
@mentions still work, like this: @alberto. See below for details.
1.4. Why we have our own platform, and it’s different
With so many people using Facebook, Twitter and other popular social networks, why don’t we simply run Edgeryders from one or more of them? Why do we insist using our own platform?
-
Living tech. The edgeryders.eu platform is designed to be “living tech”, co-evolving with the community using it. Instead of developing it first and using it later, we started from a standard installation of an open source software package (Discourse), used it a bit, changed it more to how we like it, used it a bit more, changed it again and so forth. As our needs for tools to collaborate become more sophisticated, we integrate them into the platform.
As a result, we get a platform that all of us really own. You can find it, with all the changes we made, in our Github repository edgeryders/discourse. You are welcome to install and use it yourself in any project you like, and also to pioneer new features with us. Let us hear your ideas in the Support & Development workspace (and no, you don’t need to be a developer for that!).
-
No intermediation. For example with Spot the Future, you are talking to UNDP in a space that UNDP designs and pays for. We believe we should not need to go through corporations to talk to our own institutions.
-
Fairness. On the Edgeryders platform, all your content remains yours. You just grant us the license to show it to others (legal information here).
-
No commercial interest. Mainstream social networks are for profit corporations selling contextualized advertisement. Facebook in particular constantly tweaks its code to show people content that their client pay for. They want you to look at what will make them the most money, not at what you are most interested in. We do not do that, so we can guarantee that your contribution will not be buried under status updates with energy drinks or fashion brands.
-
Access over time. Facebook, Twitter and the others never delete content; but they do make it difficult or expensive to get over time. You can’t search for tweets older than 15 days; and Facebook prefers you to look at new content. Every contribution is precious to us, and we make sure it is fully accessible and indexed by search engines over time.
-
Privacy and data protection. Mainstream social networks use your activity to profile you as a consumer, and figure out what sort of advertising you are responding to the most. With our platform, you can choose to participate without your participation labeling you as a certain kind of individual in some massive database in the USA. Our servers are protected by German data protection law, one of the safest in the world.
-
Inclusion. For all these reasons, there are people in the Edgeryders community that refuse to use Facebook and Twitter, many of them hackers. We value their point of view and do not wish to exclude them.
-
Reusability for analysis. We are not simply having a conversation here: we are collectively writing a document that encodes the views of citizens engaged in future building, social innovation, lifestyle hacking and so on. To aggregate individual opinions into a collective point of view we need analysis: to do analysis we need full access to the content. Mainstream social networks do not restrict access to our content, even if we created it.
1.5. Netiquette
Edgeryders is a precious space for interaction to its community. We are proud to have somehow managed to build a space for learning safely about uncomfortable truths; for disagreeing respectfully; for asking for and freely giving help without this implying a pecking order.
The rules governing interaction are those that you would expect when talking to people you deeply respect, and want to respect you too. Be clear and respectful. Don’t be creepy. Don’t be an a§§#ole. When you post something try to make it personal, do by all means link external resources but add your own reflections to them. For more details, see our page “Netiquette”.
If you notice unpleasant or inappropriate behaviour (read: trolling or creepiness) please alert the Edgeryders team.
1.6. Security
Edgeryders is a public platform and in that sense, not secure. Yes, we encrypt the data transferred from and to the website with SSL. We store your password in an encrypted way. We do not collect your real name and we prefer you don’t tell it. But still, it’s a public platform, and all its content is public, and its messages are not end-to-end encrypted.
So, don’t use this platform for stuff you want to keep secret, or for content that could have serious consequences if connected to your real-world identity.
For content licencing details and our privacy policy, read the corresponding chapters in our page “Terms of Use and Privacy Policy”.
1.7. What if my written English is not that good?
Edgeryders is a global community, and we take pride and joy in this diversity. We choose to communicate in English because it is the best approximation to a global language there is, but most of us are not native English speakers. If you can write in English, even a little, we encourage you to do so in the interest of increasing your potential audience, with the promise that people will focus on your ideas rather than your command of the language. No one is allowed to look down on anyone else on the grounds of spelling or grammar errors. If you are not comfortable with that, it’s ok to write in your own language: chances are some of us read it, and anyway there is always machine translation.
2. Reading, posting and connecting
2.1. Browsing through topics
When you first visit, the home page that you see is like a table of contents of this website. You see the word Categories highlighted as a red button in a menu bar with other choices. This site calls the main content areas “categories.” A Category can also have one level of sub-categories. Within them are “topics” (discussion threads), and each topic consists of “posts” (comments).
The horizontal main menu offers you other ways of looking at the content within this site. Try each one out and see which view is best for what purpose. We ordered them left-to-right by relevance:
-
Unread lists all posts that you are subscribed to and have not read yet.
-
New lists all topics that you have not ready yet (whether you are subscribed to them or not). At first that means everything. On that screen, find the Dismiss button in the lower right to mark everything as “seen.” Do this and all later visits will show you what is new to you since you marked it. Very useful.
-
Latest lists all posts that you have not ready yet (whether you are subscribed to them or not). This is the least relevant list, but after you have read all your “Unread” and “New” content you can find all other recent activity on the site from here if you want to read more. There’s a helpful red line inside this list, marking the time of your last visit so you know what happened after you left.
-
Bookmarks lists all topics you have bookmarked yourself (by clicking the Bookmark button close to the bottom of a topic’s page). It is a nice way to create shortcuts, for example (as a collaborator) to this Discourse manual, our Matrix manual and our Dynalist manual.
In addition, in your upper right view there is the hamburger menu ☰. The hamburger menu will always be there on every page. Use it as a one-click way to navigate to any other main section of the website when you are inside a topic.
2.2. Using the search field to find stuff and people
You will find the search field on the top right ![]() .
.
It works as you would expect:
-
Click the search icon, horizontal search bar will appear, start typing and relevant result will start appear on the screen.
-
To filter the result you can click option link right beneath the search bar.
2.3. Creating posts
Creating a good article has never been easy. But in Discourse, it is ![]() On the homepage or any category page, click the “+ New Topic” button in the top right:
On the homepage or any category page, click the “+ New Topic” button in the top right: ![]()
An expandable text editor will pop up in the bottom of your browser window:
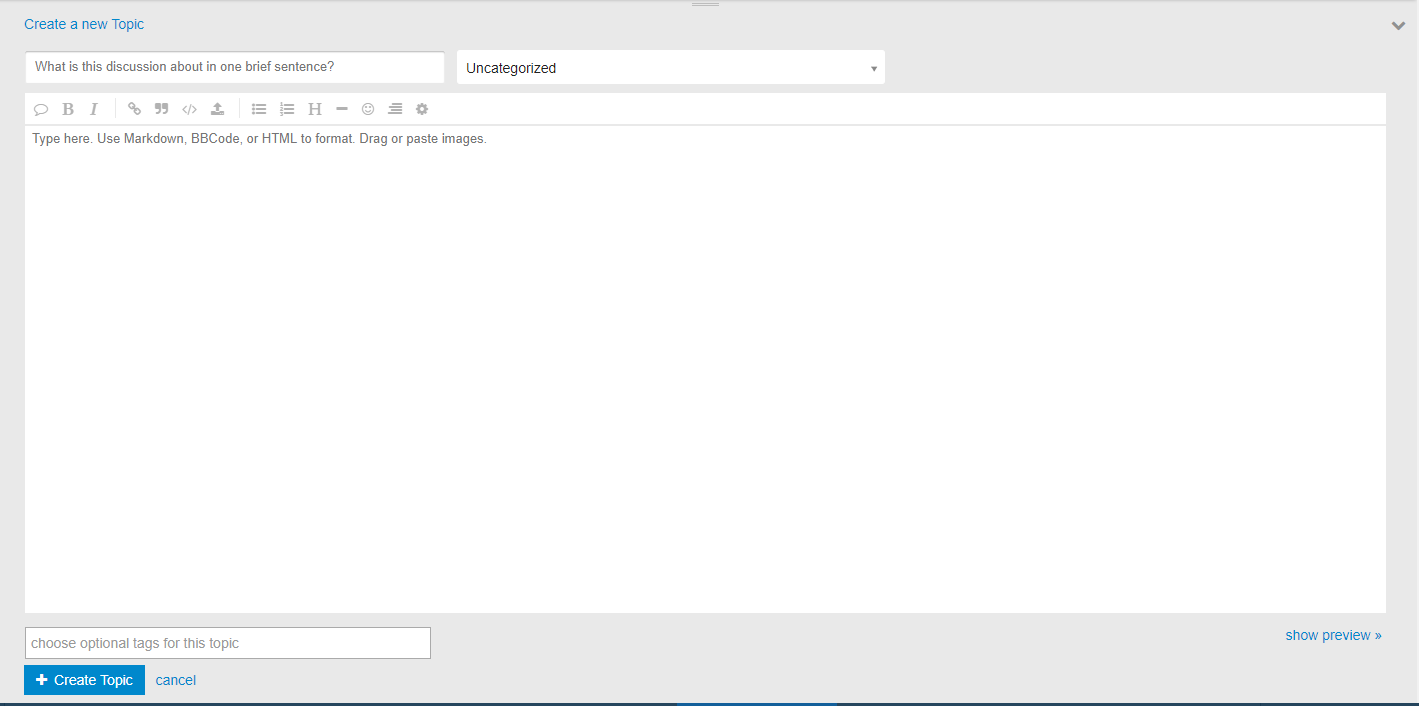
Just fill the fields in the editor form:
- In the first, single-line input field, enter the title of your topic.
- In the second, dropdown-style field, choose the category or sub-category to which your topic belongs. This defines who will be notified by e-mail about your topic, which is a big part of your potential audience. If you are not sure, choose “Campfire” or “Uncategorized” and a moderator will sort it in for you.
- In the third text-area type field, enter your topic’s main text. You can add hyperlinks, embed images by drag & drop or uploading, and format your content in several ways.
2.4. Editing existing content
Who can edit what?
-
Any signed-in user with trust level 2 or higher can edit wikis posts, which are marked by a green pen-and-paper icon in the top right of a post. (You move from “trust level 1” to “trust level 2” automatically when you participate on this platform for a bit.)
-
Authors can always edit their own content (because that is how we configured Discourse). But please be considerate with this power so that you don’t confuse readers who try to follow the discussion later.
-
Platform moderators (those marked by a shield icon behind their username) can edit everyone’s content. They will do so only without changing the meaning of what you said. For example, they might fix the occasional spelling or grammar mistake (because Google likes orthography
 ) or improve the formatting of your content. You will be notified when that happens and can always check who changed what (see below) and if necessary complain by flagging the post.
How to edit a post? To edit a post, you click on the three-dots menu below a post and then on the pen icon.
How to check the edit history of a post? For everything you can edit, you can also see the edit history of who changed what, and why. Just click on the icon with the pen that you find in the top right corner of a post, and you can browse through pairwise comparisons of the post’s versions. Above each version, you find you made the changes and often also a short note by that user why they made the change.
(You can not see the edit history of content you cannot edit – this is good because it allows you and our staff to hide information again that was made public by accident in a post).
2.5. Creating comments (skillfully)
Most topics on Edgeryders are commentable, and the community loves to use comments to reach out to others. Many times your comment will be part of a rich conversation. Here is how to be a skillful writer of comments:
-
Decide what you are commenting on. Is it the content itself? Or are you reacting to another comment?
-
If you are reacting to the original content, scroll down to the end of the comments (or to the end of the content if yours is the first comment). You will find a form to leave a comment already open. Just write the text and press “Save”.
-
If you are reacting to a comment, locate and click the link “reply” under the comment’s text on the right. Your comment will display at the end of the discussion but with a link to the comment you are responding to. This helps other edgeryders to make sense of the conversation.
-
You will make it easier for other edgeryders to engage in conversation with you if you make it clear, in the text, who is it you are talking to. Example: “I agree with you, Alice. Your remarks, combined with Bob’s, made me think that…”
When you create a comment, the following people are notified: the author of the original content; anybody who left a comment to the same content before you; and everyone else who follows the topic or one of its categories or tags.
2.6. Mentions
What are mentions? Like many popular social media platforms, this platform supports mentioning other users with an @ tag. If you want to involve another community member in the conversation you are in, you can “ping” her using mentions. As a result, that user will get a notification on the platform and, if needed, also by e-mail; the notification will contain a link to the conversation to join.
How to @mention. Mentions work much like on Twitter: type the “at” symbol @ followed by a username. If you type at least two letters after the “at” symbol, you will see some suggestions for usernames that begin with that combination of letters. Choose among them the name of the user you want to mention, as in the image below:
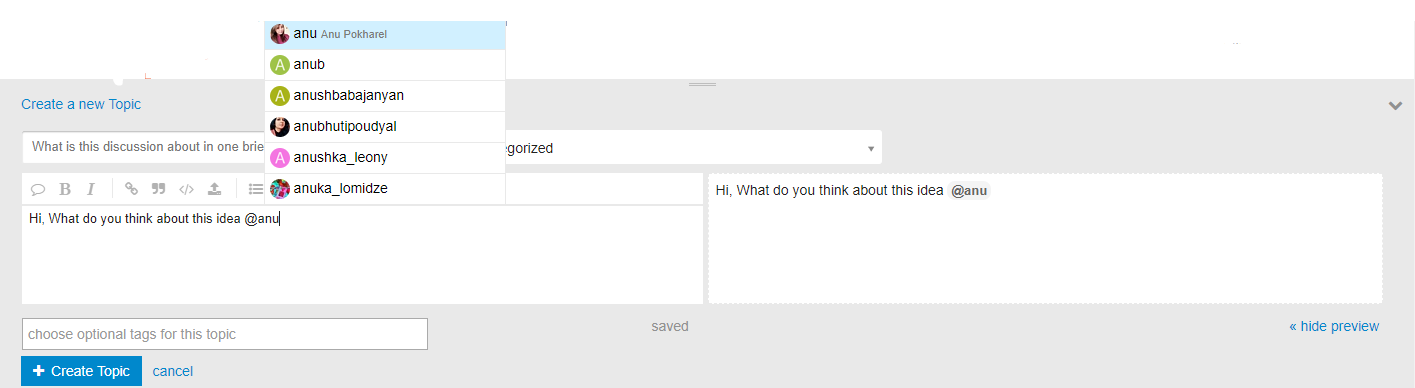
You can use mentions almost anywhere on the edgeryders.eu platform. Usernames are case-insensitive, so @edgeryders and @Edgeryders and @EDGERYDERS will all have the same result. When the mention is shown with a gray background after saving your post, it worked and the notification was sent. If it is shown just as regular text, it did not work – try to find your mistake in writing that username.
@mentions across Edgeryders Communities platforms. Currently, you can only mention a user who has an account on the same Edgeryders Communities platform (for example, on edgeryders.eu). If the username is not proposed in the @mention auto-completion list, the user does not have such an account. You can also confirm this in the User Directory, for example here for edgeryders.eu.
But what if you want to mention such a user? Send them a message or mention them on an Edgeryders Communities platform where they do have an account.
More details
More details: You can not send messages on communities.edgeryders.eu as this site is really only for logins. But normally every user also has accounts on at least one Edgeryders Communities platform because that’s where they came from to sign up. The reason why we don’t create every account on every Edgeryders Communities platform at signup time is to avoid amassing inactive accounts and to not confuse users when they receive notifications from websites where they never actively logged in. Anyway, in the future we will improve these mechanisms for cross-platform user interaction.
2.7. Adjusting your on-platform notifications
It is really empowering for you who are registered on the platform to control just how much you wish to be kept up to date and in the loop!
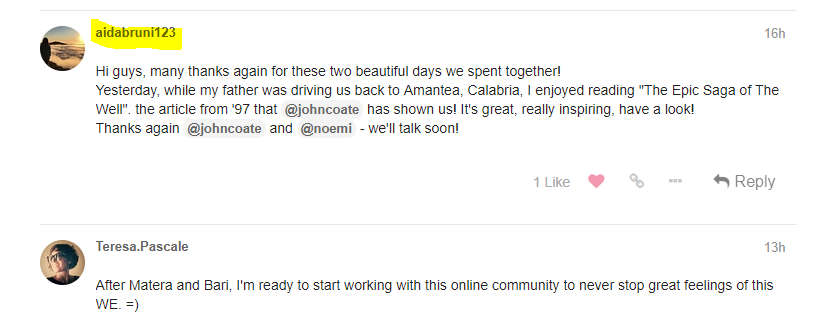
Discourse is great at remembering what you wrote or where you left off, and at taking you there. For example, the system lets you know immediately when anyone replied to you or liked something you said – on your profile picture icon in the upper right side of the webpage:
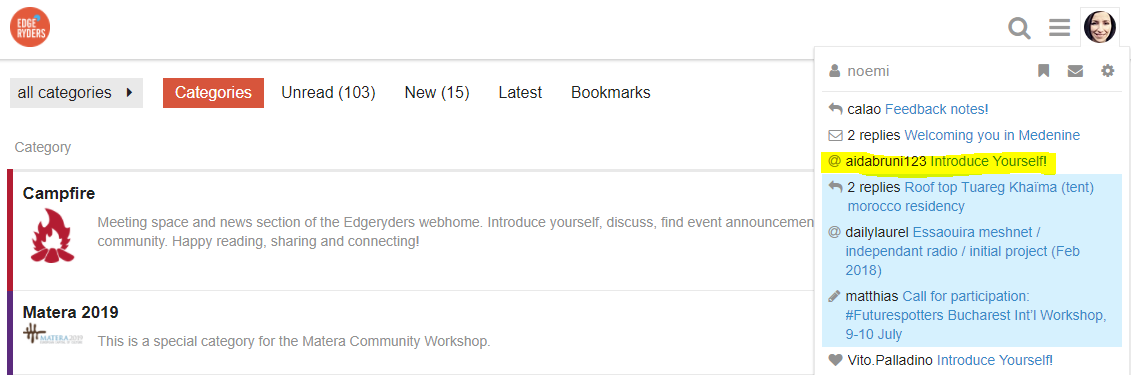
Clicking on a notification takes you exactly to the section of the topic relevant to you:
The most important part about notifications is that they are based on what content you subscribe to.
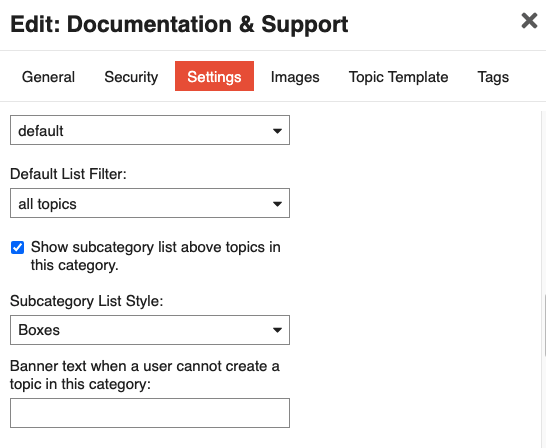
You can manage your subscriptions anytime on the pages of topics (“threads”), tags and categories. To do so, find the dropdown with a circular icon at the bottom of a topic’s page, or in the right top of a category or tag page. Then adjust this dropdown as follows:
 You are ignoring all notifications from this topic.
 You will be notified in your Unread section and in summary e-mails if someone mentions your @name or replies to you.
 You will be notified in your Unread section and in summary e-mails of every new reply in this topic.
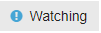 Like “Tracking”, but you receive the e-mail notifications about new replies in this topic immediately (but at earliest 10 minutes after your last visit to the website, and not if you are currently visiting the website).
There are also global settings affecting notifications. You can adapt them by going, from the top right of the site, to “user icon menu → ![]() → Notifications”:
→ Notifications”:
-
Desktop Notifications. To receive notifications about new activity in your browser. You have to adapt this setting in every browser you use separately.
-
Users. You can also suppress all notifications from selected users in by listing them in the “Muted” field.
If you want to understand the Discourse notification mechanism in more detail, look into our Discourse Administration Manual section “5. Understanding notifications”.
2.8. Adjusting your e-mail notifications
You might be annoyed by getting too many e-mails. This is what you can do:
If you don’t want e-mails about certain content
To not be notified about certain kinds of content, adjust your notification settings accordingly. To do so, find the dropdown with a circular icon at the bottom of a topic’s page, or in the right top of a category or tag page, and adjust it as follows:
-
For topics. Set the notification level to “normal” to be notified about mentions and replies in activity summary e-mails. Set it to “muted” to never be notified about this topic.
-
For categories. Set the notification level to “muted” to never see topics from this category included in your activity summary e-mails about new topics. This helps to get rid of notifications from categories that exist for technical reasons, with no discussions in them, for example for our system of hosting web content inside Discourse. We muted these categories for everyone already, but might forget to do so if new categories of this type are added. You can always see a summary of your category notification settings under “Preferences → Notifications → Categories” in your user profile.
-
For tags. It is possible to mute tags, preventing new topics with this tag from appearing in your activity summary e-mails. However, since we do not apply tags very consistently, this is not particularly useful.
If you want fewer but longer e-mails in general
Go to “top-right user icon menu → ![]() → Emails” and adapt the settings as needed:
→ Emails” and adapt the settings as needed:
-
Replies. You can change your replies preferences as desired.
-
Activity Summary. When you don’t visit here, you will be sent a summary e-mail of topics and replies that you are interested. Specifically, this covers any new items in your Unread section, which is based on the topics, categories and tags you are subscribed to. These e-mails will only come if there is anything new, and you don’t have edgeryders.eu open in a browser tab anyway. You can choose if to include content from new users in these summary emails, and you can adjust their frequency:
- Every 30 minutes
- Hourly
- Daily
- Every three days
- Every week
- Every two weeks
-
Mailing list mode. Enable mailing list mode overrides the activity selection. Muted topics and categories are not included in these emails.
2.9. Reaching out through messages
Another way to reach out, this time on a one-to-one basis, is to send them a message. Look through the user directory and click on the name of the person you are looking for; you can do the same anywhere else where that username is shown, including in @mentions.
Now, a small popup will appear like below:
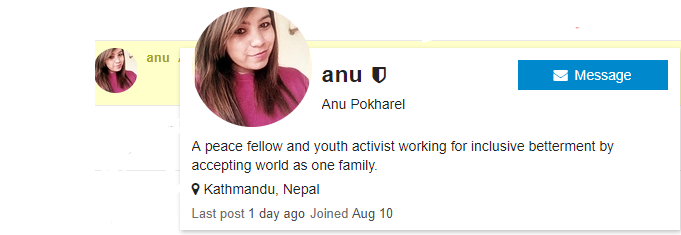
Click on the Message button to compose your message; this messaging system allows us to contact each other in a private channel even if you do not know each other’s email address.
2.10. Interacting with other users outside of this platform
We encourage all edgeryders to keep as much as possible of their interaction within this platform. It’s free, open, and self-hosted: the community has complete control over the database. However, some projects just need other kinds of tools.
3. Creating advanced content
3.1. Formatting text content
For details about content formatting and a reference of all ways to do this, please refer to our detailed documentation topic:
3.2. Structuring long or complex content
With the Discourse text editor and limited formatting options, it can be challenging to write or edit long and complex texts. Here are our best practices that emerged to deal with this:
Content that fits into one topic. If your content is around 10 screen pages or less, it fits well into a single, structured topic:
- Put all your content into the first post of a topic. The posts below that should be limited to discussion comments.
- Create numbered chapters and sub-chapters. Use the “1. – 1.1. – 1.2. – 2. – 2.1.” etc. numbering format. Start with heading level H2 for the first level of chapters (
## 1. Chapter Titlein Markdown), because the Discourse editor also starts with that heading level. - Add a table of contents. (see below).
Content that does not fit into one topic. If your content is longer than around 10 screen pages, or requires more than two levels in the table of contents (means chapters like “1.2.3.”), better split the content across multiple topics as follows. Overall, this is much more navigable (and editable) than trying to cramp all content into one topic. In addition, this technique is useful to move some parts of the content out of a public topic into access restricted categories, where necessary.
-
Create an index document. Again with chapters, sub-chapters and a table of contents. Some (sub-)chapters might contain content, others would only contain a (one-sentence or more detailed) summary and link to a different topic with the actual content.
-
Make the index document a pinned topic in its category. Usually, not always – only if the topic is important / central enough to be pinned.
-
Write sub-topics. These are normal topics with detailed content. Structure the subject matter there as normally for “content that fits into one topic” (see on that above). Especially, start the chapter numbering and level from “1.”, since each of these is an independent topic and they are just referenced from the index topic.
-
Add a sub-topic note. In the topics with the detailed content, add a note to the top like this:
This topic is a linked part of a larger work: "<Linked title of index topic>"
After that note, there should be a gap to the rest of the content to emphasize it visually. A following heading (
## Contentetc.) will provide that. If no heading follows, create a line containing instead to provide this. -
Tag the sub-topic. We use tag
subtopicto indicate its special role. This is meant to hint users to this in topic lists and when they start reading past a topic’s title. The tag provides a list of all sub-topics, but this is more a side-effect here.
For examples of this technique, see various sections in this user manual document:
- “Formatting your content”
- “Adding a table of contents”
- “Writing in Arabic and other right-to-left scripts (RTL)”
3.3. Adding tables
Tables in Discourse can be written in HTML, in Markdown or in pure text. (Markdown tables did not work in some earlier Discourse versions, though.) Note that text tables are not responsive (so might be too wide for mobile users), need a fixed-width font, and do not allow further formatting inside the table. However, they might be useful for special cases where copy & pasting a table as plain text is desirable.
Example of a Markdown table:
| Col A | Col B | Col C   |
|-------|-------|---------|
| A1    | B1    | C1      |
| A2    | B2    | :smile: |
Result:
| Col A | Col B | Col C |
|---|---|---|
| A1 | B1 | C1 |
| A2 | B2 |
Tips and tricks:
-
Copy & paste as Markdown tables. Discourse has an (experimental) feature that converts HTML to Markdown when copy & pasting it into the Discourse editor. When copying a HTML table in the browser, the browser will also convert it internally to a plain-text format called “tab separated values” (TSV). You can also create such a format yourself in a text editor. In any case, pasting two or more lines of TSV text into the Discourse editor automatically converts it to table in Markdown syntax.
-
Formatting in HTML tables. When creating HTML tables in Discourse, further markup inside the table can only be in HTML. (This seems to be a bug, as Markdown allows to mix with HTML freely.)
-
Tables in lists. All three types of tables can become part of multi-level lists. See details and an example.
-
Tables Generator. You can of course write the table code manually, but there’s a nice tool that can help you generate all three table types: Tables Generator.
-
Import in Tables Generator. You can use the various import functions in Tables Generator to comfortably edit tables from an existing Discourse post (a wiki, your own post, or a post you’re fixing as an admin):
-
Markdown tables. Copy the Markdown code copied the Discourse post editor and paste it at “File → Paste table data …”. Markdown text formatting inside cells is shown as Markdown source code and can be edited that way.
-
HTML tables. There is no direct way, but you can use the browser’s conversion to tab separated values: copy the rendered table from the browser and paste it at “File → Paste table data …”. This will lose formatting of text in the table. To avoid that, better use Markdown tables.
-
TablesGenerator JSON tables. TablesGenerator has its osn JSON based format “TGN”, allowing to preserve really all of the table formatting. Use “File → Save table …” to save as a TGN file, and “File → Load table …” to load it again. You can attach that file to a Discourse post by uploading it like an image. For wikis with complex tables, this is a good way to allow others to edit the tables comfortably. (To use this technique on another Discourse site, an admin needs to add
tgnin setting “authorized extensions” first.)
-
-
Good looking text tables. When creating text tables with Tables Generator, you can enable “Use Unicode symbols for table borders”. It will look much nicer, especially if you use the technique from “Adding simple graphics with box drawing characters” to insert them without gaps between lines of text. That works by enclosing it in a code block like this:
```semigraphics
this is a code block for tables
```
3.4. Adding videos, maps and other embedded content
Embedding iframes
Discourse does allow to embed external content by using <iframe> HTML elements in your topics, but only for whitelisted domains. So if your iframe does not work in a Discourse post, ask an admin to add the domain mentioned in the iframe’s src attribute to the Discourse setting “allowed iframes”.
Onebox embeddings
In addition, Discourse has its own mechanism for embedding content, called “Onebox”. You may know it from WordPress blogs already: post a URL to a video, map or other content on its own line, with no whitespace before the URL, and the URL will automatically be turned into a link preview or even embedded content.
The following is a list of Onebox embeddings that result only in a small link preview box with an image and text, not in embedded content using iframe:
- URLs handled in special ways by the Discourse onebox gem library, if the handler does not provide
iframeembedding (for which see the list below). See the full list. - Other URLs with a whitelisted domain that provide oEmbed metadata but not of type
rich(source).
This mechanism only works if the domain is not blacklisted for this purpose (none is currently on edgeryders.eu).
The following is an (incomplete list) of Onebox embeddings that result in embedded content using an iframe:
- Google Maps links
- YouTube links to individual videos
- Vimeo links to individual videos
- Twitter tweets
- publicly accessible Google Docs documents (to be confirmed)
- other URLs that provide oEmbed metadata of type
richand with an<iframe>element inside (source)
This mechanism only works if the domain is not blacklisted for this purpose (none is currently on edgeryders.eu) and if the domain is included in the “allowed onebox iframes” Discourse setting (all are included on edgeryders.eu currently).
As you see, the domain of a Onebox link has to provide an own <iframe> element in its oEmbed metadata or has to be handled specially in Discourse itself such as YouTube videos etc… For this reason, PDF files cannot be embedded with the Onebox mechanism, but they may be embedded by posting iframe code provided for this purpose by a PDF hosting service such as Scribd (and getting that service whitelisted in the Discourse forum – see above).
3.5. Adding images
Using Markdown
The standard syntax and our convention for inserting images is to use the code produced by the editor’s “Upload” button.
Example:

Result:
![]()
For the link, you can use:
- The
upload://URL scheme used by Discourse when uploading images - A relative URL such as
/uploads/default/original/2X/6/621….jpg. - A full URL such as
https://example.com/a.png. Be sure to only use HTTPS URLs as this platform is HTTPS-only, so browsers may not load imaged embedded via an unencrypted HTTP connection.
Just as with Markdown hyperlinks, it is possible to reference URLs with short identifiers and then list the actual URLs in a list further down. Identifiers can be numerical, but don’t have to be.
Example:
![CC-BY logo|88x31][logo1]

[logo1]: upload://q7MC9yJNpYqjfS68RId87oHKzUE.png
Result:
![]()
Using Markdown: Scaling
It is possible to configure how large the image embedded in the Discourse post will be displayed. This does not change the uploaded image, which is still visible in its full size when clicking on it (for uploaded images larger than 690×690 px in our installation, as smaller ones do not get provided an option to click on them as they would usually fit in full into the post). The syntax is according to here:
Example:

Result:
![]()
Admissible values are 1-100%. This will scale the image down proportionally to the given percentage size, from its original size or from the maximum thumbnail boundary dimensions of 690×690 px, whichever is smaller. Sometimes this behavior is not flexible enough. You can then change the [width]x[height] display size in the Markdown element to achieve sizes >100%, non-proportional scaling, 1x1 px hidden images and other effects.
Example:

Result:

Using HTML
Earlier versions of Discourse used the <img src="…"/> HTML syntax to insert images. This still works, but requires you to give a relative or absolute URL of the image file. The upload://… URL scheme does not work here.
Example:
<img src="/uploads/default/original/2X/6/621….jpg" width="200" height="60" alt="Test Alt Text" title="Test Title"/>

The main advantage of the HTML syntax is that it allows to set the image title manually. It will be displayed in a tooltip overlay when mousing over the image. Titles can be long (whole paragraphs) but cannot contain formatting. Still, this can for example be useful for a somewhat interactive graphic, made from several pieces / image tiles.
In the Markdown and BBCode syntax however, the image title is always initialized from the upload filename, cannot be overwritten or changed, and will only be displayed for images that can be enlarged (means, upload size exceeds the bounding box of 690×690 px).
Using HTML: Scaling
You can use the width="…" and height="…" attributes to scale the image. All values are interpreted as pixel values. Scaling to a size larger than the content width is not possible – the maximum size with an effect is 690×690 px. Non-proportional scaling is possible. When you give only one value, the other is calculated so that scaling is proportional.
Example:
<img src='/uploads/default/original/2X/6/621….jpg' width="100" alt="Image" />
Using BBCode
For completeness: BBCode provides a tag to embed images. None of the BBCode img options are interpreted. Using it requires you to give a relative or absolute URL of the image file. The upload://… URL scheme does not work here.
Example:
[img]/uploads/default/original/2X/6/621….jpg[/img]
Result:
3.6. Adding simple graphics with box drawing characters
This is a bit of a rare and weird use case – but if you want to draw some simple shapes to explain something and don’t want to go through the hassle of starting your drawing program, drawing, exporting and uploading the file, this can be a quick and effective solution. Also, it allows others to modify the drawing right inside Discourse (for example in a wiki), without needing an external program and without needing to ask you for access to your original file.
Setup
Before anyone can use the instructions below, a Discourse administrator has to do the following steps:
-
Create an entry
semigraphicsin the “highlighted languages” setting of the Discourse admin backend.This is not supported by the HighlightJS library that Discourse employs but will still result in
<code class="lang-semigraphics">…</code>markup to which we can apply the necessary styling below. -
Add the following CSS snippet under “☰ → Admin → Customize → Themes → (choose theme) → Common → CSS”. This keeps the usual line gap for all code formatting except our
semigraphicsstyle, where gaps between lines would make box drawing characters look ugly.body pre { line-height: 100%; } pre code { line-height: 1.4; } pre code.lang-semigraphics { line-height: 100%; }
Usage
-
Go to diiagrams.com and draw something.
If you want a drawing that is part of an indented list in Discourse, you need to leave some text columns empty to the left: 4 for each list level to indent.
-
Click on
Unicode. -
In the window that appears, click
[Copy]. -
Paste the drawing at the right position into your Discourse editor.
-
Surround your drawing with code fences markup (if needed indented to the right list level) and indicate
semigraphicsas the highlight language. It will then show properly in the editor preview. Example code:```semigraphics ┌┬┐ ├┼┤ └┴┘ ``` -
Since the usage of Unicode box drawing characters is not perfect in this tool, you may need to do some manual postprocessing by replacing some characters with more suitable ones. It is easiest to find the right character in an example shown below.
Box drawing examples
┌┬┐ ╓╥╖  ┌┬┐ ┎┰┒
├┼┤─╟╫╢  ├┼┤─┠╂┨
└┴┘ ╙╨╜  └┴┘ ┖┸┚
 │   ║    │   ┃
╒╤╕ ╔╦╗  ┍┯┑ ┏┳┓
╞╪╡═╠╬╣  ┝┿┥━┣╋┫
╘╧╛ ╚╩╝  ┕┷┙ ┗┻┛

╔══╦══╗  ┌──┬──┐  ╭──┬──╮  ╭──┬──╮
║┌─╨─┐║  │╔═╧═╗│  │╒═╪═╕│  │╓─╁─╖│
║│   │║  │║   ║│  ││ │ ││  │║ ┃ ║│
╠╡   ╞╣  ├╢   ╟┤  ├┼─┼─┼┤  ├╫─╂─╫┤
║│   │║  │║   ║│  ││ │ ││  │║ ┃ ║│
║└─╥─┘║  │╚═╤═╝│  │╘═╪═╛│  │╙─╀─╜│
╚══╩══╝  └──┴──┘  ╰──┴──╯  ╰──┴──╯

╭╷╮  ╃╀╄  ╆╈╅   │╎┆┊ ┃╏┇┋
╶┼╴  ┽┼┾  ╊╋╉   │╎┆┊ ┃╏┇┋
╰╵╯  ╅╁╆  ╄╇╃   │╎┆┊ ┃╏┇┋

┏╻┓ ┌╽┐  ┟┲┱┧   ──── ━━━━
╺╋╸ ╼╋╾  ┞┺┹┦   ╌╌╌╌ ╍╍╍╍
┗╹┛ └╿┘  ┢┭┮┪   ┄┄┄┄ ┅┅┅┅
         ┡┵┶┩   ┉┉┉┉ ┉┉┉┉

█               ╲│╱
▉  ╱╲╱╲╳╳╳      ─╳─
▊  ╲╱╲╱╳╳╳      ╱│╲
▋  ╱╲╱╲╳╳╳
▌  ╲╱╲╱╳╳╳      ░░▒▒▓▓██
▍               ░░▒▒▓▓██
▎ ▁▂▃▄▅▆▇█
▏
Source: extracted from “UTF-8 encoded sample plain-text file”.
Notes and future improvements
Ways to extend the above ```semigraphics mechanism include:
- similar highlighting styles with different CSS formatting applied, for example
semigraphics-redwould allow to create big colorful elements in the text to draw attention
The diigrams.com tool we use above was written by Martin Buck. He provides a description and discussed it. The tool is not open source software, though.
If we want an open source tool for the same purpose, the options are:
-
textik.com: Great user interface incl. resizing, moving, connectors etc… It renders as plain ASCII boxes, but since it is open source it could be easily adapted to generate Unicode box drawing characters instead (here).
-
js-boxdrawing: You can use it right in that online demo, or install it from Github. Drawing happens with arrow keys, which is nice in some cases and not nice in others.
-
aa2u: A small tool that can convert ASCII art drawings (as created by textik.com and many other tools) to those using Unicode box drawing characters. But bit difficult to install as no package is provided.
-
svgbob: If we’d want to modify Discourse a bit, we could let the ASCII diagrams be converted to SVGs (or from there to PNGs) when saving the post, using this tool. It supports Unicode box drawing characters, and also ASCII box drawing. Due to that, users could create their drawings using any of the other tools that output ASCII. (Of course users could also use svgbob locally, but why – the workflow is then the same as for a real drawing software.)
-
ditaa: similar to svgbob but also allows to create diagrams, even with colors.
There are many more options that are either not open source or only create ASCII based output. For an overview, see here.
You can find a lot more, detailed tips and tricks about using box drawing characters and other Unicode features here:
-
Block Elements (provides things not in the examples above)
-
Using pseudographics in blogposts: drawing ASCII diagrams and boxes
-
Taag, a converter from normal text to ASCII art font. Quite funny.
3.7. Adding a collaborative drawing
For vector oriented drawings
-
Create a new drawing in Google Draw.
-
Make the drawing publicly editable. Or otherwise share it with the Google accounts of people who should have access.
-
Get a public URL for your drawing from Google Draw. This is somehow in the options. You will be able to choose the size of your drawing. Here, it can be useful to choose a size larger than the 690×690 px size that is visible by default in Discourse posts. Because when clicking on the image, a fullscreen version will be shown, and when clicking on that version again, a version in 100% scaling will be shown.
-
Embed the image in your Discourse post. In the Discourse editor, click the “Upload” button, then choose “From the web” and paste your drawing’s public URL.
-
Add a paragraph with instructions below the image. For example:
Please contribute edits to this drawing as needed. Access the editable version [link] and make your changes. The embedded version above is updated automatically: reload this page and you should see your changes immediately.
-
Make the post a wiki. This makes it more recognizable that this post contains content that is open to be edited by everyone. See section “2.13. Creating a wiki” for instructions.
For raster graphics drawings
[TODO]
3.8. Adding slides
See this topic for detailed instructions:
3.9. Adding file attachments
You can add file attachments just like images in the Discourse editor by using the “Upload” button in its toolbar. Any file that is not recognized as an image will be rendered as an attached file that can be downloaded. Example:
example.txt (25 Bytes)
In addition, the filename has to match one of the allowed extensions for non-image files, which are currently:
.pdf.txt.json.tgn.html
If you have a reason for uploading file attachments with a different extension, you can ask a Discourse admin to add the new extension in setting “authorized extensions”.
3.10. Hiding details and editorial comments
This is treated in its own topic here: “Hiding details and editorial comments”
3.11. Writing in Arabic and other right-to-left scripts (RTL)
For writing in RTL script when creating a post in the Discourse editor, first configure the writing direction for the editor textbox (if not already the default for you). For that, right-click into the editor’s left textbox and choose “Writing Direction → Right to Left” (tested in Chrome, will be similar in other browsers).
That step will however only show right-to-left text properly in the editor, not in the preview on its right side or the final rendering after saving. To fix that, use the text direction tag around your text in the editor. Before you start writing, simply click the “right-aligned lines” in the editor’s toolbar to create a [text-direction=rtl] … [/text-direction] tag, and write your content inside.
Put one blank line above and below the opening [text-direction=rtl] to keep Markdown formatting before and inside working (until we can fix these issues, #91 and #92).
For more detailed instructions, refer to Writing in Arabic and other right-to-left scripts (RTL).
3.12. Creating content from existing documents
Discourse accepts Markdown, BBCode and (some) HTML for text formatting in its editor (details). By convention, we exclusively use Markdown on our platform, with HTML where no Markdown equivalent is available (for example for <kbd></kbd>).
So if you have a document in (for example) Microsoft Word format, you have to convert it to Markdown first and then you copy&paste the result into the Discourse editor. As a final step, usually some manual postprocessing will be needed.
For conversion, here are some tips:
-
Under Linux, from Microsoft Word:
pandoc file.docx -f docx -t markdown --toc --wrap=none -o file.md -
Under Linux, from LibreOffice Writer:
pandoc file.odt -f odt -t markdown --toc --wrap=none -o file.md
3.13. Creating content with custom formatting
Discourse provides a very limited set of content formatting options, in order to keep a uniform and clean look and to prevent exploits of security vulnerabilities in the browser.
However, sometimes these options are just not sufficient. For these cases, you can format your content as a PDF or HTML document and upload this document just like an image – see 3.9. Adding file attachments.
The document will then appear as a linked attachment in your post, and a user clicking on it will see it rendered in the browser. So the file is not offered for download – but of course the user can still do that via “Save as …” from the context menu.
In such a document, you have a full browser window and can display anything you want, the way you want. For TML documents for example, that includes:
- custom CSS formatting
- embedded JavaScript widgets such as calculators
- embedded images in the HTML file (using base64 encoding)
- images uploaded to the Discourse site as normal and then referenced in an
<img …>tag (but also show these images in your Discourse post itself, otherwise Discourse would delete them as seemingly orphaned images if setting “clean up uploads” is enabled)
4. Organizing content
4.1. Using categories
Each topic on this platform is first sorted into exactly one category. You can see an overview of all our categories on our frontpage.
Categories are meant to group topics together in a basic way. Think of these as broad themes that we talk about here. Or as the table of contents of this whole website – indeed, our frontpage even looks like that.
Categories are there to help website visitors find the content they are looking for. They come as a two-level hierarchy: main categories (broad themes), of which each can contain sub-categories (narrower themes). Each category or sub-category can contain any number of topics (texts created by the community members on this website).
Of course you can subscribe to a category to get notified when new content is added to it. Refer to section “Notifications and Subscription” for detailed instructions.
4.2. Using tags
Each topic on this platform is sorted into a category – however, this is quite a broad classification, and each topic can only be sorted into one category each. So, there is another way to categorize: tags.
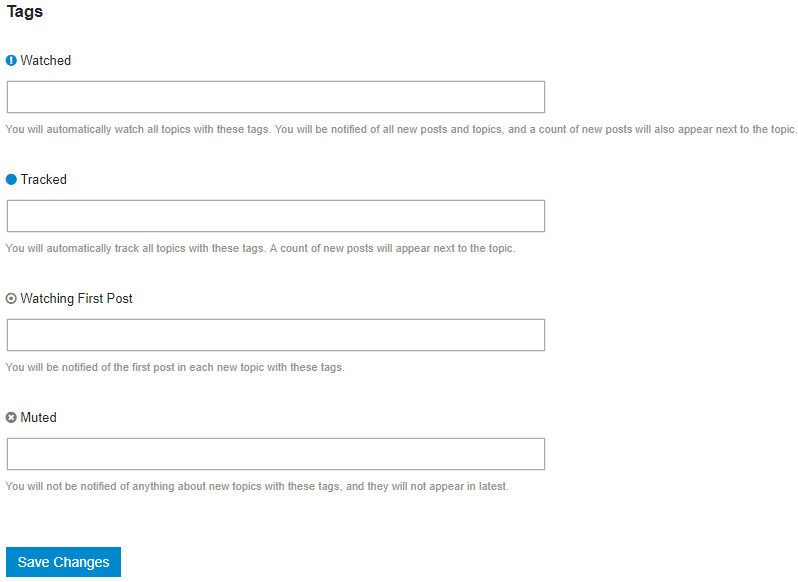
In general, you don’t have to assign any tag to topics you create, except you are a moderator on this site. But you can use the list of existing tags to navigate better on this website: when visiting any tag from there that interests you, you will see a list of all topics tagged that way. Also, in the right top of such a page you will see a dropdown showing a circle icon. This allows you to subscribe to the tag in various ways, so that you are automatically notified when content is added with this tag. For example, you could subscribe to our call-for-applications tag, which we use when we have an offer for a paid job, for fellowships and the like.
After you subscribed to multiple tags, you may not remember to which ones. In that case, look at the overview that you find in your user avatar menu under “![]() → Notifications → Tags”. It looks like this:
→ Notifications → Tags”. It looks like this:
For a bit of orientation, here are the types of tags we defined and use on this platform:
cat2-*: A tag encoding the “dimensions of well-being” as a secondary category. Links to the topic lists for all these tags are provided on the page “Community → What we care about”.blog: Topics that appear on the blog of the Edgeryders company (see “Company → Official Blog” in the menu). Any outstanding and relevant topic can go there. Only staff members can apply this tag, so if needed just ask one of our admins or moderators.project-*: Projects by the Edgeryders company (for example project-opencare), but also projects by members of the Edgeryders community that are spread over more than 1-2 topics (for example project-biochar-rocket-stove).{projectname}-*: A tag namespace for each project, using the same project name as theproject-*tags. This allows project teams to manage their own set of tags in any way they like, without having to fear that any moderator might interfere with the naming or application of these tags. Not used much so far, but two examples are unmonastery-evaluation and unmonastery-book-of-mistakes, belonging to project project-unmonastery.ethno-*: Selections of content created for research projects done with the Open Ethnographer software. This type of tags can only be applied or removed by staff members.
4.3. Creating a wiki
Wikis are just normal posts in Discourse, except that they can be edited by every user and not only by its author and moderators. Wiki posts are recognizable by their special green icon in their top right, for example:
![]()
More precisely, wikis can be edited by every user we trust for that, configured currently to “trust level 1” – every user who is not so totally new that their username appears in light gray. That is also the current trust level requirement to be able to make ones own post into a wiki – you do not have to be moderator or admin for that.
To create a wiki:
-
Create a topic. Because usually, by convention, we only create wikis out of the first posts of a topic. But technically, it works with every post – first posts in a topic as well as comments.
-
Click “Make Wiki”. You find this button after saving your post by clicking on the grey “…” below it, then on the grey wrench icon.
4.4. Adding link targets
If you want to create and share links that jump to a certain position inside the webpage when visiting them, you can do so as follows:
-
Add a HTML heading tag (
<h1>to<h6>) to your content at the position where you want to place your link target. If you want to combine this with a heading, use<h1>to<h5>as they are designed to be used. If you want an invisible link target, use<h6>because we adapted the Discourse CSS to make it invisible. -
Add an
idattribute to your heading tag with a value starting withheading--. How you complete the attribute’s value after that is up to you. A widely used convention is to use only lowercase characters, digits and dashes-though. Your finished link target would look like in these examples:<h2 id="heading--2">2. My Title for The Second Chapter</h2> <h6 id="heading--invisible-link-target"></h6> -
Create and test the link you want to share as follows: the normal Discourse link to the topic or post as copied from your browser’s address bar, with your
#heading--…ID appended. For example, this section about link targets has a link target itself, and the link would be:https://edgeryders.eu/t/discourse-user-manual-for-edgeryders-eu/6463#heading--2-19If this topic had several posts by several users, a link to a link target in post no. 5 would be:
https://edgeryders.eu/t/discourse-user-manual-for-edgeryders-eu/6463/5#heading--1 -
Optionally: shorten your link. You can shorten the link you constructed above by replacing the title slug with something short. We use a minus “
-” by convention, as it is also used for this purpose in the Discourse admin backend at times:https://edgeryders.eu/t/-/6463#heading--2-19Caveats
Due to a bug in Discourse, at the current time (2019-03) you can not completely remove the title element. The link
https://edgeryders.eu/t/6463#heading--2-19would work only half way then: it will leads to the topic, but not to the section because the subpart marker will be lost during the internal link forwarding process.Additionally, another bug in earlier versions of Discourse that has been fixed by now prevented the
/t/6463link format from working within the same website. It did work for links clicked on external domains, though.Additionally, another bug in Discourse currently causes links in the
https://edgeryders.eu/t/-/6463#heading--2-19format as created above to drop their#heading--…subpart marker during a link forwarding step. This happens after the jump to the right subsection has been made, so you can use these links already. If you want to avoid the dropping of#heading--…right now, you have to use the link with the current version of the title slug, without abbreviating it in any way (beyond making it a relative link, where applicable).
4.5. Adding a table of contents
We have a convention for headings and a table of contents that lets you jump to all headings in a post (usually only in the first post of a topic, often a wiki). Detailed instructions are in topic “Adding a table of contents”.
4.6. Creating posts in multiple languages
If your content comes with translations into other languages, our convention here is to format it as seen in this example and described below.
(1) List the available languages
At the very top of your post, create a list with links to the available language versions, by using Markdown code based on this template:
**_Available in: :gb: [English](#heading--en) / :ru: [Russian](#heading--ru)_**
It will result in the following output (minus the quote formatting):
This list takes on a similar role to a table of contents, just that in contrast to our usual way of adding a table of contents, you use subpart markers in the hyperlinks made from #heading-- plus a two-letter language code. Using subpart markers that start with #heading-- is needed because it’s the only way to create links that work from external pages and sites as well and not just within the same post.
The :gb: and :ru: code pieces will show the flag icons. Just type :, select “more…” from the popup menu that appears, and see if your flag icon is already available. Some are in the “Custom” section, as we added them ourselves. If your desired flag icon is not to be found, just omit it – an admin will notice and add it to your post later.
(2) Add language headers to the different language versions
Before you start your content in a new language, you need to include a language header like this (for English):
## <h2 id="heading--en">:gb: _English version_</h2>
or this (for Russian):
## <h2 id="heading--ru">:ru: _Russian version_</h2>
and similar for other languages, again using the flag icons and two-letter language codes. The <h2 id="…">…</h2> tag defines a target to jump to, used in your hyperlinks in the list of available languages. As a result, you will see:
English version
(Your English content goes here.)
Russian version
(Your Russian content goes here.)
(3) Separate the different language versions
Put code like this before the language header of each language version, which will create a simple horizontal line as a separator in the output:
---
5. Other aspects
5.1. Deleting your account
Deleting your account is possible, but not straightforward because our software solution “Discourse” includes various protections against forum vandalism and moderator damage. We recommend the following procedure:
-
Download your content. If you want to keep the content you posted, perhaps to upload it somewhere else, you should download it before deleting your account. For that, navigate to “user menu →
 → Activity”, and click Download My Posts.
 -
Delete your account. The simplest way for this depends on how much and what kind of content you posted – please unfold the suitable section below.
If you posted …
… substantial content
Note that according to our Terms of Use in section “3.1. Licensing of single contributions”, you granted everyone a Creative Commons Attribution licence for your content. So in case you posted anything substantial that might be of interest to others on the Internet, we as the Edgeryders OÜ company would like to use that licence grant and keep your content online. Properly attributed of course. For that:
-
Go through the content you posted and remove whatever information you don’t want to be online after your account deletion. This is meant to apply to sensitive information like names and personal information that might get people into trouble later. You find an overview of all the content you posted in the “user menu →
→ Activity” section. -
Optional: if you want, edit some or all pieces of your content and add to the bottom to whom that piece should be attributed when using it under the Creative Commons licence. For content where you don’t do this, we will assume you want it attributed to the pseudonymous
@anon…user that will replace your username after your account has been anonymized by us. -
Contact us, either by simply sending a direct message to @matthias or from our contact page, to ask for account deletion while preserving the content. Also mention if you have made any edits to hide information.
An admin will then anonymize your account with a Discourse admin feature, which removes your e-mail address and all profile information and changes the username to
@anon…(example). This automatically also changes all your @mentions to that anonymized username. If you made edits to hide information, an admin will remove the old revisions of the posts you edited from public access by setting them to “hidden”.
… substantial content and you really want it deleted
First delete all posts that you really want deleted (you find an overview of all the content you posted in the “user menu →
→ Activity” section). Then proceed as described under “If you posted something substantial”. Or in case you really want everything you wrote deleted an it’s too much for you to delete it manually, proceed as described under “If you posted nothing substantial, but a lot”.… nothing substantial
If you posted nothing of significance for the general public (say, you only participated in organizing an event or similar), you can delete all your posts by yourself first. (You find an overview of all the content you posted in the “user menu →
→ Activity” section.) After that, you can delete your account by navigating to “user menu → ” and clicking the Delete My Account button at the bottom (source).… nothing substantial but a lot
If you posted (say) 20 or more times, then the previous process of deleting your own content one by one becomes too uncomfortable. In such a case, you can contact us, either by simply sending a direct message to @matthias or from our contact page, and ask for account deletion incl. content deletion. An admin user will do that for you, using a different kind of tool. Please allow up to 10 working days for that to happen, as we won’t always find time to do this immediately.
-
5.2. Posting links to Discourse topics on Facebook
It is possible to post links to a topic on this website on Facebook in such a way that Facebook generates a proper preview image for it.
This is not guaranteed to work with links to posts (replies to a forum topic, with URLs of the form https://example.com/t/title/1234/12). In these cases, Facebook might use a preview image from higher up in the topic. But it works properly with topics (with URLs of the form https://example.com/t/title/1234) if they contain an image.
Here are the instructions:
-
Create your topic on this website, and include an image.
-
Start to create a post on Facebook and paste the link to your topic. Often enough, Facebook will not show any preview image yet, namely if you are the first person ever sharing that link on Facebook.
-
Wait for 2-4 minutes. Facebook needs that long to create a preview and sort it into its own systems.
-
Delete the link and paste it again. Without saving / posting the Facebook post, delete the link you inserted above, and then insert the same link again. Now, the new preview should include a proper preview image.
-
Save the post to publish it on Facebook.
5.3. Making link previews work for embedded videos
See this topic for detailed instructions:
5.4. Converting a topic to PDF
Sometimes, you want a PDF in a higher quality than what you get by using the browser’s print function on the page of a Discourse topic. Mostly, you’ll want to remove the author avatar, comments, header and footer menu. Here’s how:
-
Construct the URL of the print-optimized version by appending
?_escaped_fragment_to the normal URL of the Discourse topic. For example, you will get OpenVillage House Sidi Kaouki Manual. -
Visit that URL and choose “right click menu → Save as …” and save with type “Webpage, complete”.
-
Open the resulting
.htmlfile in a text editor and remove the sections you don’t want (comments, header and footer menu, author avatar). -
Still in the text editor, convert all links to other parts of the document to relative links that only use the subpart marker, for example
<a href="#chap-2-9">…</a>. Only then they will scroll the PDF document, otherwise they would open in a browser. To convert the links, search for the full URL of the document you saved and replace all occurrences with nothing. -
Save the
.htmlfile and open it in the browser and choose “right click menu → Print …”, then save it to a PDF.
Alternatives include selecting the desired content in your browser and copy&pasting it to a new LibreOffice Writer document. However, this resulted in several formatting glitches (headers look like normal text, some numbering sections use a different font etc.).
5.5. Following content by RSS
You can append .rss to any URL of a Discourse topic, category or tag to get the associated RSS feed URL. Put that URL into your RSS reader to follow the content. This is an alternative to having an account and using the Discourse e-mail notifications.
Exception: If you want to follow content in a non-public category via RSS, you will need an account because you will also need to add your API key for authentication. (Ask a moderator or admin to create an API key for you if you don’t have one yet.) In this case, the URL format to use is this:
https://edgeryders.eu/c/cat/subcat.rss?api_key=…
5.6. Administration functions and other advanced uses
If you are interested in the administration functions of Discourse (our website’s software) or in some tips and tricks for advanced use of Discourse, have a look at the administration manual that we wrote: